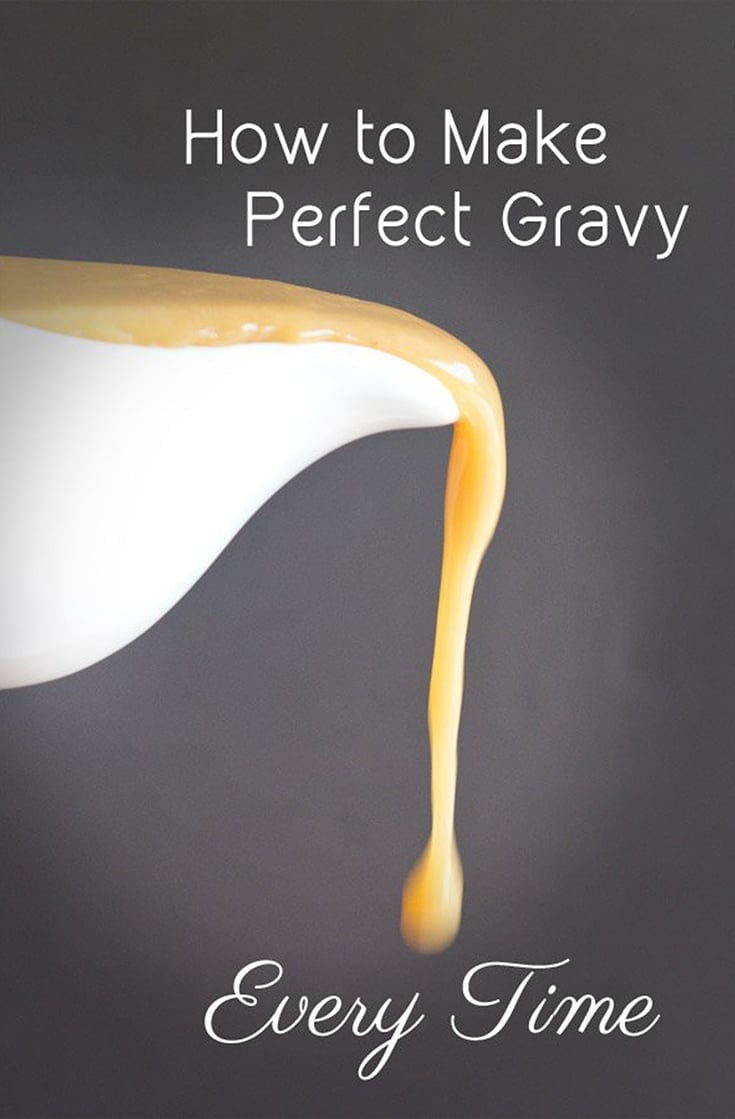
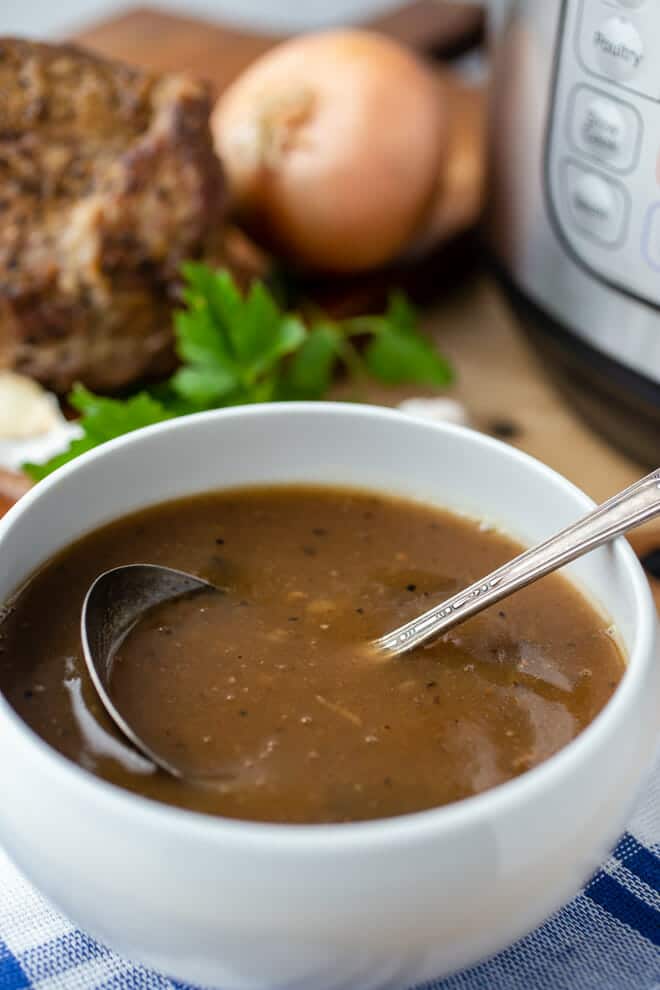
Learn how to make a flour gravy that’s delicious and has the correct thickness every single time. The ratio of flour to fat to stock is given as well as the method for how to combine everything to make it taste amazing.
Making gravy used to be a mystery to me. I’d add flour to my roast’s drippings and maybe some broth or stock. Then season it up, stir it up, and simmer it up. Sometimes it would be delicious, thick but not too thick, meaty but not overpowering. Other times, it would taste a bit like flour, water, and salt. Too thin. Just plain not good.
I did some research and started making notes about what I was doing. I’m going to tell you the stuff that worked and what led to me being able to make perfect gravy every single time.

Want To Save This Recipe?
Enter your email address & I’ll send this recipe straight to your inbox to save for later! Plus, you’ll get new recipe ideas from me every week!
Gravy isn’t complicated but if you want to be great at it you need to understand why you’re doing each step. What I’ve done is to put a very lengthy explanation here with pictures and all the info you need. It has the method and also the gravy ratio for how much fat to use with how much flour and how much stock or broth.
This post is going to tell you how to make a gravy using flour. All-purpose white flour. You would use a different method if using cornstarch or any other flour as a thickener. If you want to use cornstarch, amounts are given over here in my Instant Pot Gravy recipe and also in this delicious Cornstarch Gravy Recipe.
As I said, the instructions are a bit lengthy but, at the bottom of this article, there’s a much shorter set of instructions in printable form that you can take into the kitchen with you.
If you have any questions, please put them in the comments below. I’m happy to answer and help you make the best gravy of your life, and I hope you’ll then keep making it for the rest of your life. It’s easy once you’ve got it down. Promise.
Video: Steps For Perfect Gravy
Ingredients
There’s only a few ingredients you need to create a delicious gravy from scratch. First, you’ll need butter or fat that has been rendered from your roast. You also want plenty of drippings from roasting your meat with the fat removed. Not making a roast or don’t have enough drippings? Not a problem, see my Gravy without Drippings recipe or keep reading to discover my other solutions.
Other than that, all you need is some all-purpose flour along with salt, pepper, and any other seasonings you want. Let’s get started on my best gravy recipe.
How To Make Gravy Perfectly Every Time
Step #1: Make Good Drippings
Drippings are the liquid (fat and juices) that pool at the bottom of your roasting pan when you cook a large piece of meat or poultry. The thing is, sometimes you don’t get a lot (or any) drippings. So I’ve found a way to get nice concentrated meat juices no matter what.
(Side Note: It is totally possible to make gravy without drippings if you, for instance, are a vegetarian or aren’t making a roast but want gravy anyhow. The method is a bit different but the results are great. Learn how to make gravy without drippings here).
To make sure that I have lots of good drippings, even from a small roast, I put unsalted store-bought broth in the bottom of the roasting pan while the roast cooks. Just a quarter of an inch or so.

To get amazing drippings when roasting a turkey, head to this recipe. I cannot say enough good things about how amazing the gravy from this turkey end up!
Why do you need good drippings?
I first explained how and why to do this when I did the instructions for How to Roast Pork Perfectly over here. But basically, that broth evaporates as the roast cooks. As it does, some of the broth is left on the sides and bottoms of the pan. Those bits caramelize there. Midway through roasting, add more liquid and it will wash those caramelized bits into your juices making them more delicious.
Also, by putting broth in the bottom of the pan I counteract something that can happen with roasts. Sometimes you get nice juices coming off of the roast. Other times, not as much. When there’s less they can sometimes burn a bit on the bottom of the pan. A mild caramelization of juices is fantastic. But too much and your drippings will taste burnt and then so will your gravy.
Having the broth in the bottom of the pan stops the possibility of burning. Instead, juices that fall from the roast drop into the broth and mix in there.
Step #2: Separate The Juices
Pour all the juices from the roasting pan into a gravy separator.

This is like a measuring cup with a long spout that goes right to the bottom of the cup. The fat of your drippings will rise to the top and the tasty juices will stay at the bottom.

When you pour from a gravy separator, the spout is down at the bottom so it gets your juices out first, not your fat. (Although we are going to use some of that fat. Don’t you worry!)
Step #3: Get All The Flavor From The Pan
You need to get all of the flavor out of the roasting pan.
I use a spatula to make sure I’m getting all the browned bits and then anything else from the bottom of the pan.

Why I don’t make gravy in a roasting pan:
Unlike a lot of people, I don’t make my gravy right in the roasting pan. I find that it’s too big and is harder to incorporate the ingredients.
Instead, just use that spatula like I said and make sure you get all the goodness out. After using the spatula, if there’s a lot of nice caramelization on the roasting pan, pour some wine or water (1/2 cup should do) in there and bring it to a simmer, stirring around and then add that to the juices in your gravy separator.
Step #4: Ratio Of Fat, Flour, And Liquid For A Perfect Roux Gravy
I should say that there are several different methods to make gravy. My favorite gravy is a flour roux gravy because I feel like I really have control of the amount I make and the eventual thickness. So that’s what I’m explaining here.
Tip: The important thing to know when making a roux gravy is the ratio of flour to fat to liquid. The ratio I use is:
1.5 tablespoons fat to 1.5 tablespoons flour to 1 cup liquid, which yields 1 cup of gravy.
(Note: If you like your gravy thicker, go with 2 tablespoons of fat and 2 tablespoons of flour to 1 cup of liquid, which yields 1 cup of gravy).
What you do is decide how many servings of gravy you need and then work from that towards the above ratio to get your amounts.
Let’s figure out the amounts we need:
You’ll want 1/3 – 1/2 of a cup of gravy per person. So if you need 6 servings then you want 2-3 cups. I tend to go with the higher amount because I like leftover gravy. (For ideas of what to do with leftover gravy, check this out!). But probably most people can go with the smaller amount.
For 6 people we need 3 cups of gravy so we’ll need:
- 4.5 tablespoons of fat (that’s 1.5 tablespoons fat X 3 cups of gravy = 4.5 tablespoons fat)
- 4.5 tablespoons of flour (that’s 1.5 tablespoons flour X 3 cups of gravy = 4.5 tablespoons flour)
- 3 cups liquid (6 people X 1/2 cup liquid = 3 cups liquid)
Now that we’ve used our gravy ratio to get our measurements, we can make our roux gravy.
Step #5: Make The Roux
Use a measuring spoon to scoop the right amount of fat from the top of the gravy separator.

Pour the fat into a medium saucepan. Using the fat from the roast instantly gives your gravy extra roast flavor. If you don’t have that much fat on the top of your gravy separator, or if you don’t really like this idea, go with unsalted butter for your gravy recipe.
Put the butter in the medium saucepan and melt it over low heat. Then remove it from the heat and proceed with the below.

Add the same amount of flour to the saucepan as you have fat (we’re going with 4.5 tablespoons of each for 6 people).

Note: The following is NOT happening over the heat. You do this part at the counter.
Whisk the fat and flour together into a paste.
Tip: I really like using a flat whisk like this because it gets right into the edges of the saucepan. It’s one of my favorite tools in the world for all kinds of things, but especially for making gravies and sauces.
(FYI, the paste you just made is called a roux. You can use a roux like this as a base for all kinds of sauces and soups).
Step #6: Make Your Drippings Tasty
Taste First
Before you add any of the drippings to your roux, taste them. Sometimes a lot of salt or other seasoning from the outside of the roast gets washed off into your drippings.
If they’re really salty, you need to know that before you add them to the gravy. Pour a little into a bowl and slurp. They should be meaty and flavorful but not salty.
If your drippings taste great, proceed with step #7 below.
What to do if your drippings don’t taste great
If not, pour them into a large bowl, leaving the fat in the gravy separator (you don’t need this fat anymore. Discard it or save it for another use). To the liquid in the bowl, add unsalted store-bought broth or stock.
If you’re making chicken, pork, or veal gravy, use chicken broth. For beef gravy, use beef broth. You can instead use water or wine. Just make sure you’re not diluting the meaty flavor too much. If the meat flavor is very intense, water and wine will be great. If it’s less intense, you need that broth for your gravy recipe.
Keep adding broth, stirring and tasting until your liquid has a nice unsalty flavor.
Step #7: Get The Right Amount Of Liquid
Now make note of how much liquid you have. Remember, our goal this time is 3 cups of gravy so the recipe calls for 3 cups of liquid. How much do you have? If it’s more than 3 cups, you’re not going to use it all. You can add the extra to your mashed potatoes instead of milk, freeze it for later, or discard it.
If, on the other hand, you have less than 3 cups, then add to it. As noted above, you can use unsalted broth or stock, wine, or water. Only go with wine or water if the drippings are very meaty flavored. If they’re not, stick with broth or stock. Make sure it’s unsalted though. Gravy can get salty quickly as it simmers and reduces. You want control over that salt as much as possible.
Step #8: Actually Making Gravy
Whisk about one-sixth of your liquid into your butter and flour roux. You want a nice smooth paste.

Pour in a bit more and whisk it some more. You want it to be smooth after each addition. Do it a couple more times. Then you can go ahead and slowly stream in the rest of the liquid, whisking the entire time to make sure you don’t have any lumps. (If there are a few lumps, don’t worry. We’ll be straining it later).

Step #9: Heat And Cook The Gravy
Once all of the liquid is in and it’s whisked and smooth, put the saucepan over medium-high heat. Stir often until it comes up to a boil.

Reduce heat to low and simmer for a minute or two so the gravy thickens a little.
Step #10: Taste And Season The Gravy
Taste the gravy. What you want now is to check for seasonings. It might need a little salt and pepper. Add small amounts at a time because it can get salty quickly.

I also add poultry seasoning to chicken and pork gravies. Or whatever seasoning I put on the roast. I don’t like to add much though (about 1/4 teaspoon to 3 cups gravy). I like the gravy to taste rich and meaty. I don’t want it to cover up the flavor of the other foods on my plate.
Step #11: Strain the Gravy (optional)
OK, one last step, and it’s optional. For reasons I don’t understand, some people love lumpy gravy. Well, maybe I do get it. I also like bits and pieces of tasty stuff floating in my gravy, though not so much lumps of flour. Whatever.
Anyhow, if it’s just for us, I skip this. If it’s for company, I do it. I sit a fine mesh sieve over my gravy boat and strain the gravy in (if you’re worried about making a big mess getting it through there, strain it into a large bowl and then pour it into your gravy boat).

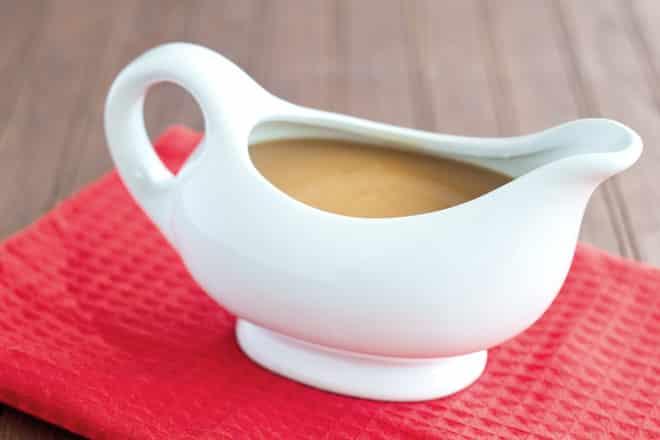
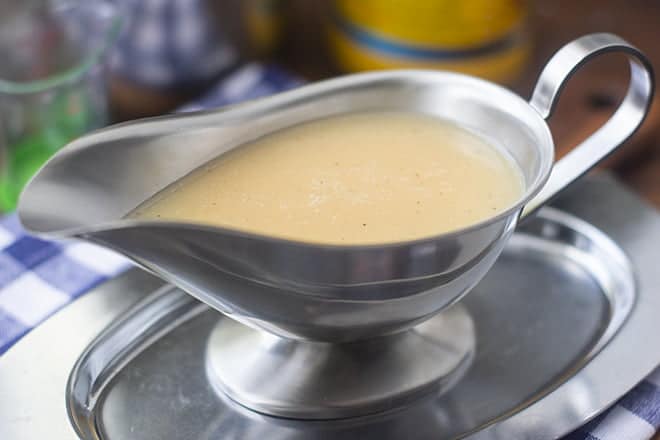
There you have it. That’s how to make gravy using a roux perfectly, each and every time.

Frequently Asked Questions
Here are some questions that I’ve been asked about this gravy recipe. Have another question for me? Leave it in the comments below the recipe and I’ll try my best to get you an answer.
Many gravy recipes have you mix together the flour and fat and then cook it on the stove for a few minutes. It is said that this is to cook the flour and thus get rid of the floury taste. That is probably true, however I find that bring the eventual gravy to a simmer also cooks out the floury taste, so it’s an extra step that isn’t required. I think that cooking the roux sometimes makes it turn a nice brown color, which can make your gravy browner, which is nice. Even though that possible color can be nice though, I still don’t cook the roux and for good reason. Cooking the roux can actually make it less good as a thickener once you add the liquid. This is imprecise to me. I like to know that if I add 1.5 tablespoons of flour to 1.5 tablespoons of fat, and then add 1 cup of liquid, I will get 1 cup of gravy that is of good thickness. When I cook the roux first, it doesn’t thicken as well, which means I need to add less liquid. I find that skipping that step doesn’t adversely affect my gravy and makes it more predictable and consistent.
Yes. Follow the instructions over here. That recipe is great for when your roast doesn’t yield drippings. But it’s also great if you want to make the gravy ahead of time. Make it a bit thicker if you want to drizzle in drippings after roasting meat. You can also use that method if you’re deep-frying a turkey and don’t have any drippings at all, or if you are brining your meat and the drippings are too salty.
I have seen some older Southern gravy recipes that are finished by stirring in chopped hard-boiled eggs. While I have multiple gravy recipes on the site, I don’t have any that use eggs.
More Gravy Recipes
I love a good gravy, and all kinds of sauces too. So much so that I even have a large collection of sauce recipes over here. Head on over and browse through them. I’m also putting links to some of my favorite gravy recipes here for you:
- Best Chicken Gravy
- Onion Gravy Recipe
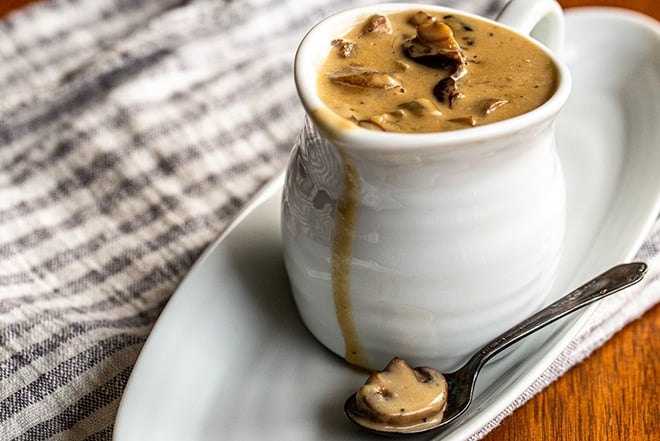
- Mushroom Gravy
- Homemade Bacon Gravy
- White Gravy
- Creamy Sausage Gravy
- Vegan Gravy
Podcast Episode: How To Make Gravy
Listen to me explain briefly about How To Make Delicious Gravy, with some great tips along the way, by clicking the play button below:
Listen to more Recipe of the Day episodes here.
Print
The Best Gravy Recipe
- Prep Time: 5 minutes
- Cook Time: 10 minutes
- Total Time: 15 minutes
- Yield: 6 servings 1x
- Category: Sauce
- Method: Stovetop
- Cuisine: American
DESCRIPTION
Step-by-step instructions with pictures for how to make a flour gravy that’s delicious and has the correct thickness every single time. The ratio of flour to fat to stock is given as well as the method for how to combine everything to make it taste amazing.
Ingredients
- 4.5 Tbsp. butter or fat rendered from a roast
- 4.5 Tbsp. all-purpose flour
- 3 cups drippings from roast (fat removed) or unsalted broth
- salt, pepper, and seasonings to taste
Instructions
- Melt the butter or fat in a medium saucepan over low heat. Remove from heat.
- Whisk flour into fat.
- Whisk in 1/2 cup drippings until smooth. Whisk in another half cup. Repeat until all drippings are used.
- Bring to a boil over medium-high heat. Reduce heat to low and simmer 1 minute. Taste and add salt, pepper, and seasonings.
- Strain through a fine-mesh sieve. Serve warm.
Notes
This recipe is for 6 servings. See step #4 above if you need more or fewer servings. Calculations are given there for how much fat, flour, and liquid you need per person.
This post originally appeared in November 2015 and was revised and republished in October 2022. This post contains Amazon affiliate links.


Hello! Thanks for sharing. I have one quick question. ALL the recipe about making gravy that I’ve come across all these years calls for the butter/fat and flour (roux) to be mixed and cooked over the fire on the stove for several minutes until it gives a little color before mixing in the broth. They say say the roux need to be cooked this way to get rid of that floury taste. What can you say about this? Have a great day!
I have always been afraid of making roasts in the oven for fear of undercooking or over cooking. I followed to a tee and it was PERFECT! I questioned the amount of spice thinking it was too little but it wasn’t. I bought a 4.91 pound roast and with the meat therm it was 3 hrs 15 min. Almost exactly what she said it would be. Follow instructions, use a good thermometer and you will have yourself a wonderful dinner. Thank you so much!!!
You’re welcome. Thanks for the comment! I’m delighted that you liked it.
Wonderful recipe! Thank you.
Had a minir freak out tonight when I went to the cupboard for the instant gravy powder… ( I know, I know).
“It’s okay” I thought, “I’ll google a recipe”, but it wasn’t that simple.
I always do my roast in a bag so have heaps of beautiful juices in the bag ready to go. All the other recipes I looked at talked about using the roasting dish and scraping the crispy bits and I was thinking I was going to have to dirty my roasting dish after all ? but you came to the rescue!
This was perfect first go! I never thought to use cooking fat to make a roux!
No more instant gravy powder for this family! Thank you!! ?
Wow, Jasmine! That’s an amazing comment. Thank you so much. I’m glad you liked it!
Hands down the best pork roast I have ever had and I will be 50 next year! My gravy came out very watery but I’m sure I probably did something wrong but it tasted amazing! Thank you so much for this receipt. Will definitely be making this again! Happy New Year!
Thank you SO much for the ratios! Contrary to other opinions, they really do make a big difference! My mother has always made the perfect gravy, and I’ve never been able to get my roux to resemble hers in consistency, so my gravy has fallen slightly short. Sometimes I nail it, others not so much. With this method, you can nail it every time! I love when I learn something new…and between your ratios, and the comments, I learned the key to make gravy perfect every time, and also that I think I’ll avoid gravy if ever in the UK (I like my gravy sans boiled cabbage water, LOL) Looking forward to looking through your other recipes! Thanks so much!
Chris, Thanks for your comment and kind words. I used to wing it with gravy too and was delighted when it worked and sad when it didn’t. The ratios have totally helped me too! I hope you have a wonderful holiday season and that you enjoy the rest of my site.
Used these instructions with the fat/liquid and drippings from my Turkey. Came out perfect, no additional seasoning needed. Thank you.
Delighted that you liked it, Tracy. Thanks for letting me know!
Thanks for perfect instructions. My mom taught me this method, and I’m here to spread the word that it is perfect. Brilliant site, and great instructions for anyone who feels daunted in the kitchen-don’t be. If you follow these steps you won’t fail.
Thank you, Nicole. That is very kind of you. Have a great day!
This is one of the best cooking sites I have seen. While I was formerly a professional cook, I still need to look up recipes! Your roux instructions are flawless. Just one note: Step #11 has a typo saying to “STAIN” the gravy into a boat. I think you mean STRAIN of course. Anyway, thanks for the superb cooking skills and explanations for the home cook.
Micki, You’re welcome and thank you so much for your kind words. I appreciate hearing that from you very much. I’ll fix the typo now!
I followed this recipe about a month ago with a pork roast and it actually did make the perfect gravy! No lumps, just thick enough, and poured elegantly. Delicious after the basic steps, and did not require any additional seasoning. Going to try it again tonight. One quick note is that I made my own marinade for the roast and that really gave the gravy its own distinctive flavour and colour. So you may want to consider what you will be adding to the roast beforehand to ensure that everything works together, especially if you’re doing this for the first time and wanting to impress your guests. Thank you for this post!
Bob, good point about the marinade. I always taste the drippings I have from the roast just in case they ended up too salty or some other strong flavor got in there. If that happens, if you don’t want to use the liquid from your roast, that’s ok. Discard it or save it for another purpose. Then use store-bought or homemade stock (chicken stock for chicken and pork, beef stock for beef). I use unsalted stock so that I can add the amount of salt that I want. Thanks for the comment and tips!
Gravy turned out excellent and was delicious!! Thank you so much for your help! This was the first time ever I made gravy and Im in my 50’s. My mom, grandma and great aunt and aunt always cooked from scratch for the family, so I never had to learn. Now they have all passed away and I know they are with Jesus in Heaven looking down on me. They would have all loved the gravy and the moist, perfect pork roast I just cooked before the gravy. Thank you for those excellent instructions as well! ???❤️??
You’re welcome, Yvonne!
I volunteered to cook a turkey for Thanksgiving and figured I might as well make the gravy because it’s simple, you just make a paste of flour and water, add it to the drippings and heat it up until it thickens, right? I only went on line to check proportions because I never made gravy for a lot of people. But nowhere did I find my “library paste” method, it was all roux, roux, roux. Yours was the easiest to understand and the most useful, especially the ratio and per-person explanations. And very good thing you said taste the liquid before adding it to the “roux” (my new word) because yikes! was it salty and strong! I diluted it a lot with white wine. My gravy came out great. It was the best gravy I’ve ever had and I don’t mean just compared to my old method. It got lots of compliments. Nine people went through four cups of it. Sadly, none left over.
David, Thank you so much for the comment. I’m so happy that it worked out for you and that you found all of the details I included helpful. I do worry sometimes that I inundate people with info. Then I hear from someone like you that all that info really helped and I’m glad I did it. You just made my day!
Grandma could make the best gravy, mama made it look so easy. Both tried to teach me. I just never mastered it. Until today. I made your perfect pork roast. Perfection. Decided to give gravy one last shot. Finally, I know how to make gravy. Sublime. Thanks for the post. I will definitely be checking out more.
Sundee, What a lovely compliment. I’m happy to have helped and am delighted that you liked the result!
You should honestly not be so accurate with the measurements and not worry about separating the liquid from the fat. The fat helps as a roux. Add flour to the meat juices and 2 oxos or some gravy granuals in the tin gradually over a medium heat stiring until it clumps together and is slightly cooked through. No point should you add salt to gravy! Salt should come from the vegetable juice in the potatoes.. gradually add the water you have saved from your boiled vegetables (potatoes, cabbage, peas, sprouts..Not carrots) add this gradually stiring with a whisk continuously. Every time it thickens add more vegetable water until you get your desired thickness. Towards the end add a teasespoon of red current jelly which gives it a nice glossy look and cuts through the fat. Best wishes chef Jay, Wales, United Kingdom.
WOW! I initially came to your site to figure out how to do a whole chicken straight from the freezer! The gravy picture was on that page, so I clicked on it. I’m so glad I did! I immediately put a little chicken stock in the bottom of my roasting pan. Your instructions were perfect! No lumps, either. My husband raved about it. THANK YOU!
Tara, So excited that it worked out well for you. I love that way of making gravy too!
Thank you for this…my gravy turned out great! Knowing what to check for, when, and why was so enlightening! Now I know what to look for at each stage and how to make adjustments as needed. I feel like I really learned how to make gravy rather than just following a recipe.
Carla, Thank you so much for your comment. That was exactly my goal with this post and I’m so happy to know that I reached it and that it helped you.
Where has this been all my life? The world finally makes sense. Perhaps my gravy courage this year will finally be rewarded! I scour the internet and cookbooks every year, thinking I’ve finally got the right information, only to resort to the back-up can or sachet. This is the info I never found. Thank you!
Corri, That’s so great to hear. Once you give it a try, come on back and let me know how it turned out for you.
If you do not have chicken broth only beef broth, not unsalted, can you adjust beef broth instead?
Yes, you can use salted beef broth. But be careful about adding salt to your roast. The salt you add to the roast can get mixed with its juices and roll off into the broth. You might want to use half broth and half water to make sure things don’t get too salty. And taste the juices before you start making your gravy. If they are very salty you will want to dilute them.
You are the BEST!! I love cooking and always host Thanksgiving & Christmas dinners (especially for my Jewish husbands’ friends) every year and have been “winging it” until now. I read every word and must say… you have done your homework! I will refer to your post from now on. Thank you for sharing!!
Thank you so much, Laurie. I’m so happy to have been helpful to you!
Oh, my goodness, this makes me SO want Thanksgiving dinner right now! I’ve never made gravy before, but I’m definitely pinning for when I do! Thanks for sharing!
Oh man, this gravy really does look perfect–it is all about the drippings for me :)