Cutting up a chicken is easy, economical, and the best way to get the exact chicken pieces you want! Here’s how to do it.
“Cut up a chicken?” you might be saying. “Why would I want to cut up a chicken when I can buy perfectly good chicken parts at the store?”
Well, there are a lot of good reasons to cut up a chicken yourself.
Scroll down to get the step-by-step photo instructions or click here to jump straight down to the recipe.
Why Should I Cut Up A Whole Chicken?
One, it’s less expensive than buying chicken that’s been cut up for you.
Two, when you do it yourself, you get the benefit of extra pieces—the back and sometimes the neck—that you can use to make stock. And yes, you can also buy stock at the store, but it’s both less expensive and tastier if you make your own homemade chicken stock.
Three, when you do it yourself, you can make chicken pieces that can be hard to find at the store. Bone-in, skin-on chicken breasts, for example, which are juicier than boneless skinless, and have amazing crispy skin too.
And four, it’ll encourage you to use all the parts of the chicken—as in have something besides a boneless skinless breast every once in a while. Like my favorite, these perfectly cooked chicken thighs.
Now of course, you could just Roast Chicken Whole. Or grill a whole chicken or bake spatchcock chicken, where you butterfly the chicken open for quicker cooking. But if you want the chicken in its individual pieces for easy cooking, here’s what to do.
How To Cut A Whole Chicken, Step-By-Step
Step #1
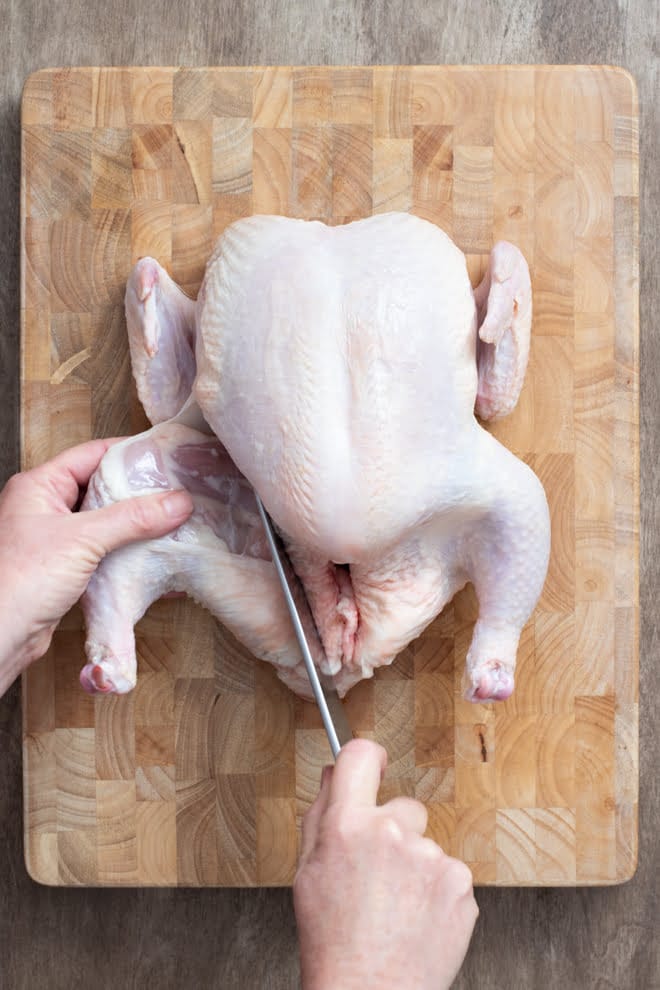
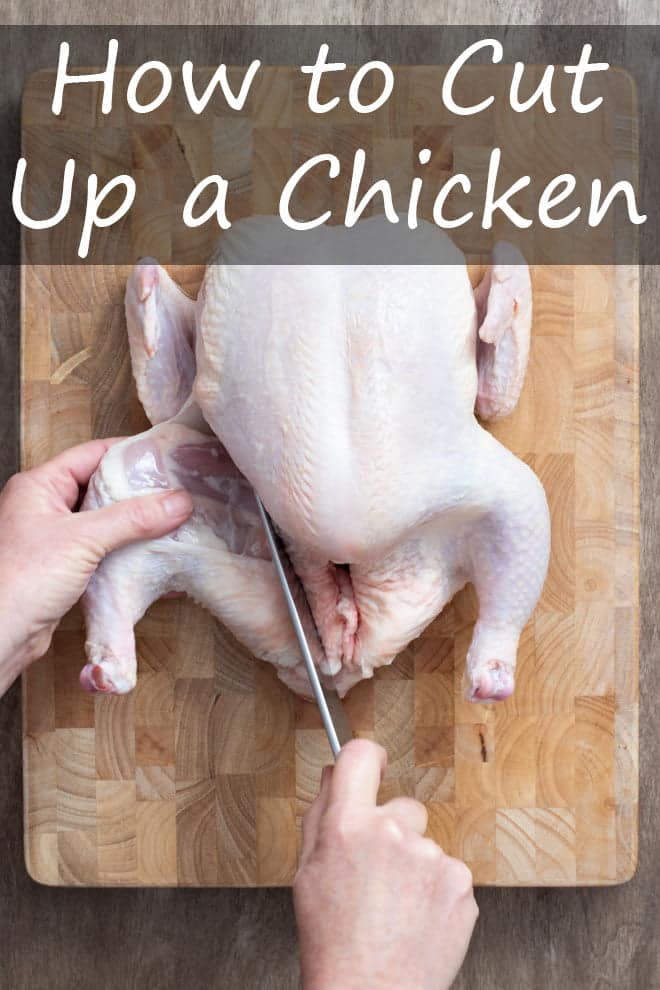
Start with the chicken on a large cutting board. With the chicken laying on its back, make a cut into the skin where one of the thighs meets the body. The chicken leg quarter should fall away from the body pretty freely, revealing the thigh joint.
Step #2
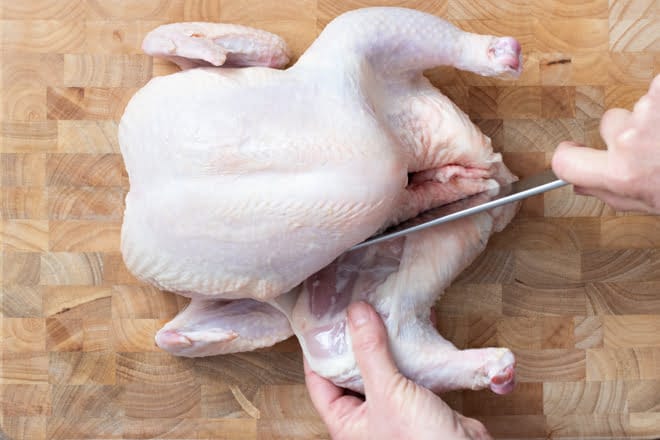
Next, hold the body of the chicken in one hand and the leg quarter in the other and fold the leg quarter back, as if you’re breaking the spine of a book, to pop the joint out of its socket. Use a large, sharp knife to cut through the joint, separating the leg quarter from the body. Repeat on the other side.
Step #3
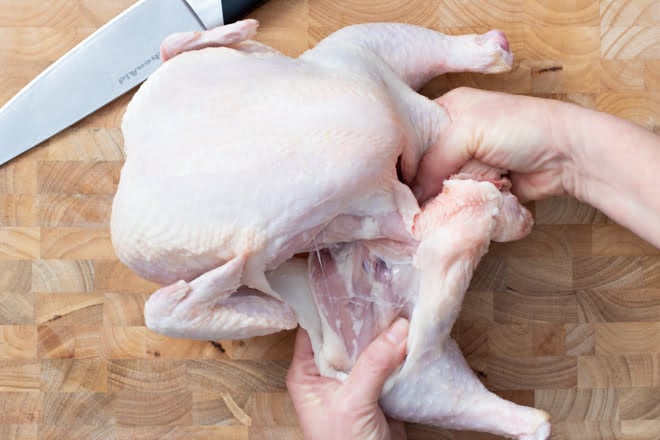
To remove the wings, grab one wing and use it to tip the chicken on its side on your cutting board. Use your other hand to feel for the joint where the wing and breast meet—it’s usually a little deeper than I expect. Cut into and around that joint, holding the wing up and using the weight of the chicken to help release the wing. Repeat on the other side.
Step #4
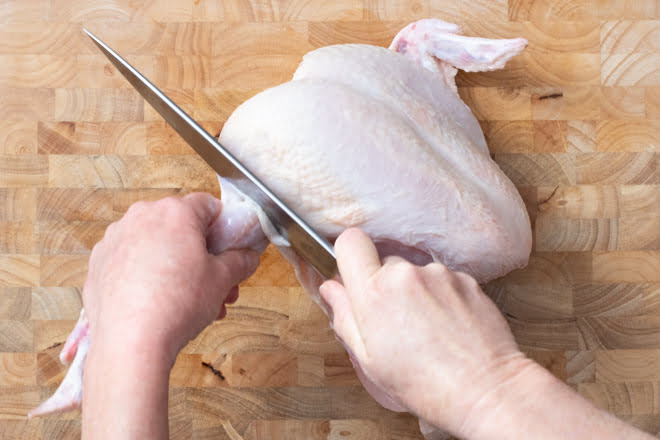
To separate the breast from the back—technically, a chicken has one breast and two half-breasts, but most recipes, including ones on this site, refer to each of these halves as a breast—look for a line of fat that goes diagonally along the side of the body from the cavity end of the breast towards the wing joint. Cut along that line all the way from the cavity opening to the head opening. You’ll be cutting across the ribs and through some small bones at the wing joint—I like to use my kitchen shears to do this, but you can also use a knife.
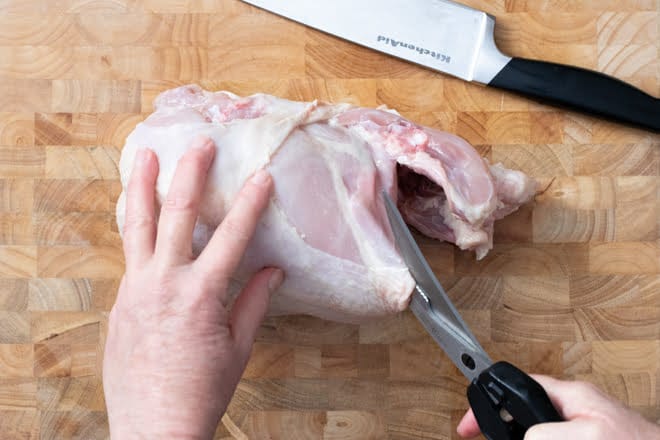
Repeat with the same line along the other side of the body.
The back, along with the neck if your whole chicken included it, is one of the many pluses of cutting up a chicken yourself. It’s great for making chicken stock!
Step #5
To cut the breast in two half-breasts—or two breasts, as most recipes refer to them—lay the breast skin side down on your cutting board and find the tip of the breastbone. It’s at the “v” of the chicken’s neckline. Use your knife to cut a slit in the bone, in the direction of the center line of the breast.
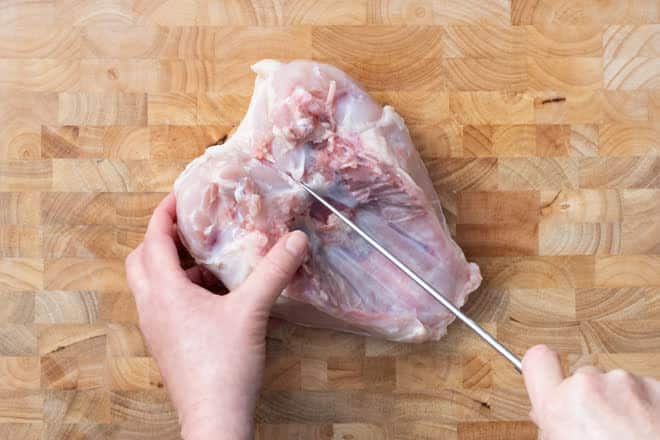
Turn the breast over, skin side up, and use your hands to break the breastbone, again as if you were breaking the spine on a book. Then use your knife to cut the breast in half down the center line.
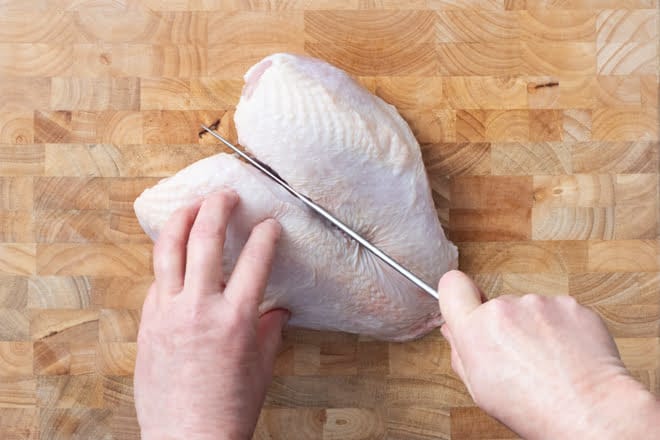
If you want, you can also cut each breast into two pieces.
Step #6
To separate the leg from the thigh, put the leg quarters skin side down on the cutting board and look for a line of fat where the leg and thigh meet. That line is a good indicator of where the joint is—cut down along it.
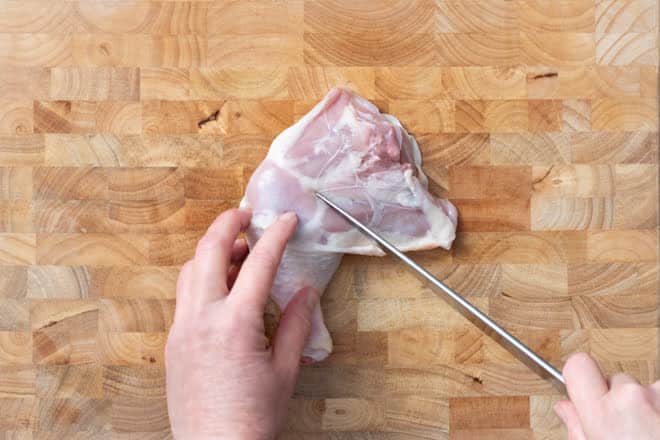
Finally, if you prefer your chicken skinless, you can remove it.
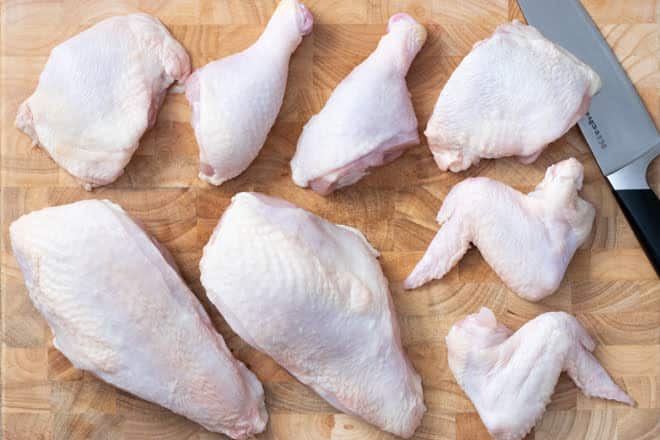
You did it! You cut up a whole chicken!
My Favorite Chicken Recipes
Now that you’ve beautifully cut the whole chicken into the various cuts of meat, time to get cooking! Get the perfect timing and learn my favorite techniques for chicken or browse all my chicken recipes.
Instructions: Cutting Up a Whole Chicken
- Prep Time: 10 minutes
- Cook Time: 0 minutes
- Total Time: 10 minutes
- Yield: 8–10 pieces 1x
- Category: Entrée
- Method: How-To
- Cuisine: American
DESCRIPTION
Cutting up a chicken is easy, economical, and the best way to get the exact chicken pieces you want! Here’s how to do it.
Ingredients
- 1 whole chicken
- Large, sharp knife
- Kitchen shears (optional)
Instructions
- Put the chicken on a large cutting board. Cut into the skin where one of the thighs meets the body, revealing the joint underneath. Pop the joint out of the socket, then cut through the joint to release the leg quarter. Repeat on the other side.
- To remove the wings, grab a wing and tip the chicken on its side. Use your other hand to feel for the joint where the wing and breast meet. Cut into and around that joint, releasing the wing. Repeat on the other side.
- To separate the breast from the back, look for a line of fat that goes diagonally along the side of the body from the cavity end towards the wing joint. Cut along that line all the way from the cavity opening to the head opening. I like to use my kitchen shears to do this, but you can also use a knife. Repeat on the other side.
- To cut the breast in half, lay it skin side down and find the tip of the breastbone. Cut a slit in the bone. Turn the breast over and use your hands to break the breastbone, then use your knife to halve the breast.
- To separate the legs from the thighs, put a leg quarter skin side down on the cutting board and look for a line of fat where the leg and thigh meet. Cut down on that line and through the joint. Repeat with the other leg quarter.
This post originally appeared in January 2020 and was revised and republished in August 2023.





Leave a Reply