Move over dry and bland boneless skinless chicken breasts! This recipe guarantees juicy, flavorful chicken breasts every single time.
Boneless skinless chicken breasts can sometimes be a bit dry and bland, but not if you bake them according to these instructions. Here you’ll find only juicy and flavorful chicken breasts, every single time.
That’s because I’ve done a series of experiments to find out exactly how to make boneless skinless chicken breasts that are juicy and delicious. If you follow these well-tested instructions, you’ll be amazed at how much better your chicken will be.
We’ll be baking the chicken breasts for this method, because it’s the simplest way to cook them, other than maybe poaching chicken. Note that a lot of the things I’ve found out though, like the minimum brining time, will apply to any way you’d like to cook your chicken breasts. So if you want to grill them or air fry them, the info below will help with that too.
To be clear, we’re talking about boneless skinless chicken breasts below. If you want instructions for baked bone-in chicken breasts, you can find that over here.

What Size Of Chicken Breast Should I Use?
If the chicken breasts are larger than 6 ounces, you should cut them in half. Why cut them? When the chicken breasts are really big, it takes a long time for the middle to fully cook through. That means that the outside of the chicken breasts are exposed to heat for a long time and that will dry them out.
If the chicken breasts are large like that, I like to cut them on the diagonal so that each half looks like a small chicken breast with its somewhat triangular shape. Here’s a video showing how to cut chicken breasts in half on the diagonal:
How To Make Chicken Breasts An Even Thickness To Cook More Evenly
It can also be helpful to pound the breasts slightly before brining so they are an even thickness. This is for the same reason as cutting the chicken breasts in half, really. You see, if part of your chicken breast is thicker than the other, it will take longer for the thicker part to get to a safe temperature. As it gets there, the slimmer part is going to dry out. Note that the rounded end of the chicken breast is usually thicker than the pointy end, so that’s what we’ll be targeting when we pound.
What I do is to put a chicken breast between some pieces of plastic wrap (that stops chicken juices from flying around your kitchen). Then I use a rolling pin or flat meat mallet to pound the thicker side down until it’s the same thickness as the thinner side.

In the end, you’ll have a chicken breast (or half of a chicken breast in this case) that is of an even thickness. It will therefore cook more evenly.
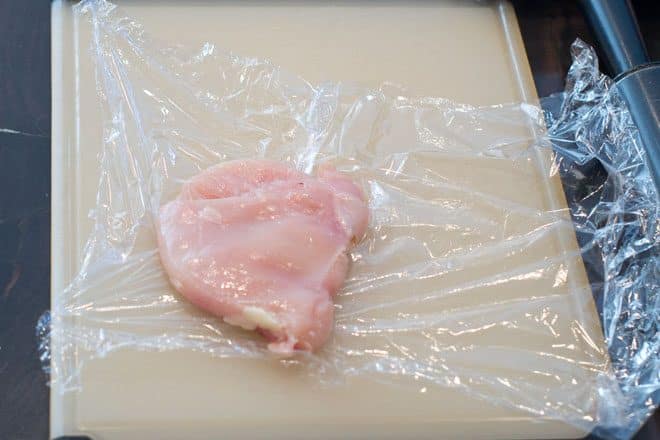
Also, since it’s overall a bit thinner than when it started, it will cook through more quickly. The quicker it cooks, the better since that means the chicken is being exposed to the drying heat for less time. Here is the full method with pictures for pounding the chicken breasts evenly.
Do I Need To Brine Chicken Breasts?
Please do! I conducted a thorough chicken breast brining experiment to find out if brining makes a difference to chicken breasts, and what the minimum amount of time is that we can brine chicken breasts for to have an effect.
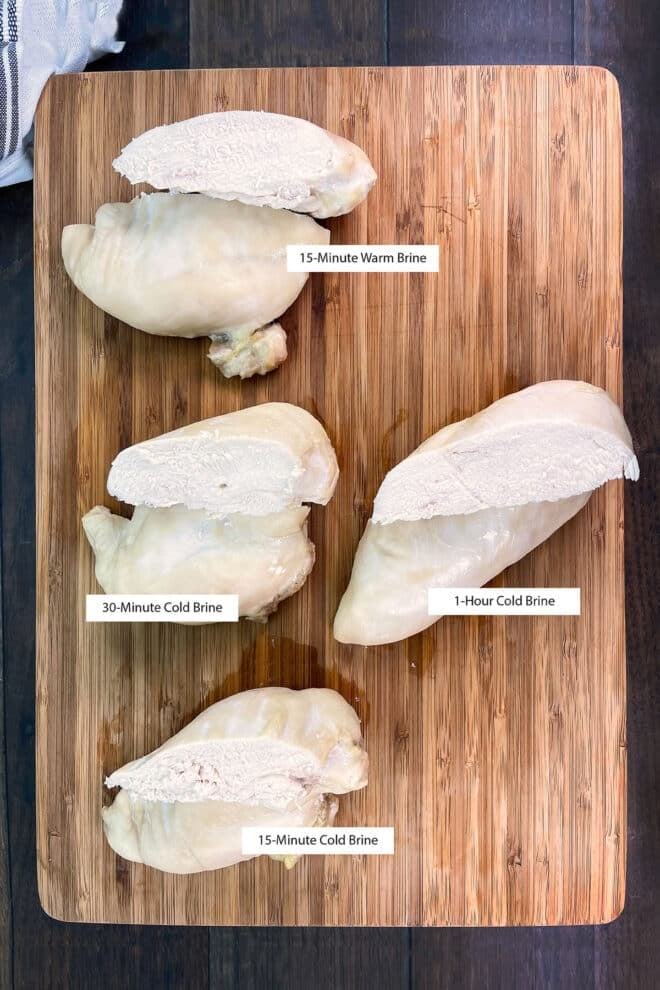
I can tell you for sure that brining chicken breasts, even for as little as 15 minutes, has a big effect, so it’s definitely worth doing and doesn’t have to be time-consuming.
What else did my brining experiment find out? First, cold tap water works better than warm water. I had read over here that warm water is better, but when I actually did the side-by-side comparison, the cold water brine was definitely the winner. So stick with cold tap water in your brine.
How long do you brine chicken breasts for?
I found that 15 minutes in the brine had a significant effect on the flavor of the chicken. The salt in the brine really penetrated and made the entire breast taste better. However, at the 15-minute mark there was no effect for juiciness or tenderness.
It turns out that the sweet spot is between 30-60 minutes for brining chicken breasts. It’s at that point that the chicken meat actually starts to change texture and hold in the liquid. However, since that amount of time can be impractical on a weeknight, the recipe below just states 15-30 minutes.
Here is what I’d recommend though. Mix up your brine, add your chicken breasts, and then get everything else prepped for your dinner. If that takes 15 minutes, you’ll get the effect of the seasoning. If your prep takes longer, then you’ll start seeing the effect on the tenderness and juiciness too.
Note that 2 hours in the brine is where I draw the line. At 2 hours the chicken stops benefiting from the brine and it can actually become too salty.
The brine recipe that I use
My usual brine recipe is 4 tablespoons of Morton’s kosher salt mixed with 4 cups of cold tap water. If you have a different kind of salt, you’ll want to have a look at my my full brine recipe, because you’ll use a different amount depending on the size of the salt crystals.
I also typically add a tablespoon of garlic powder, and sometimes also 1 teaspoon of paprika to the brine mixture for added flavor. Just mix it up really well before adding the chicken. If you want to add a serious flavor boost to your brine, you have to try my best turkey brine recipe. Even though I developed this to make turkey ultra-flavorful, it works amazingly well on chicken breasts too.
Do you need to refrigerate the chicken and brine?
I typically place the cold brine and cold raw chicken into a gallon zipper bag or large bowl and leave it right on the counter. This will be fine for up to 40 minutes. If you’re going to brine for any longer than 40 minutes, I recommend that you put the brine with the chicken in it into the fridge for the entire brining time to keep the food safe from bacteria.
After the chicken has been brined, it does not need to be immediately cooked. It can be removed from the brine and kept in the refrigerator, covered, for up to three days, or wrapped well and stored in the freezer for up to two months.
How To Bake Chicken Breasts
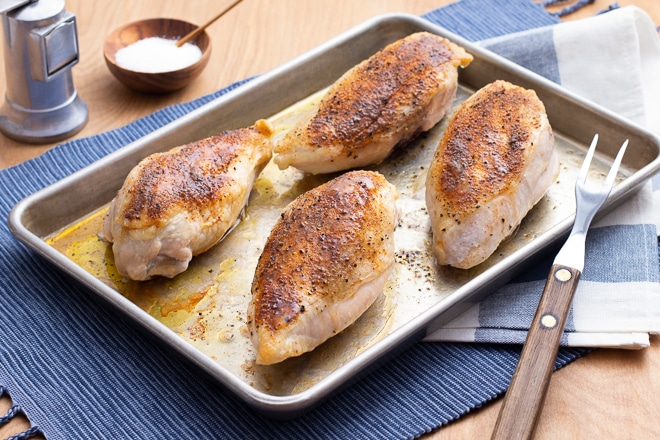
Preheat the oven to 400°F, which is hot enough for the chicken to bake quickly, but not so hot that it begins to dry out. Remove the chicken from the brine and pat dry.
Transfer the chicken to a baking dish and add some olive oil. Toss the chicken around in the oil until chicken breasts are well-coated. You can use tongs for this or use an olive oil mister or cooking spray to get an even amount of oil on the chicken breasts. Rearrange the chicken breasts in the baking dish so that they are in a single layer and not overlapping.
How Should I Season Chicken Breasts?
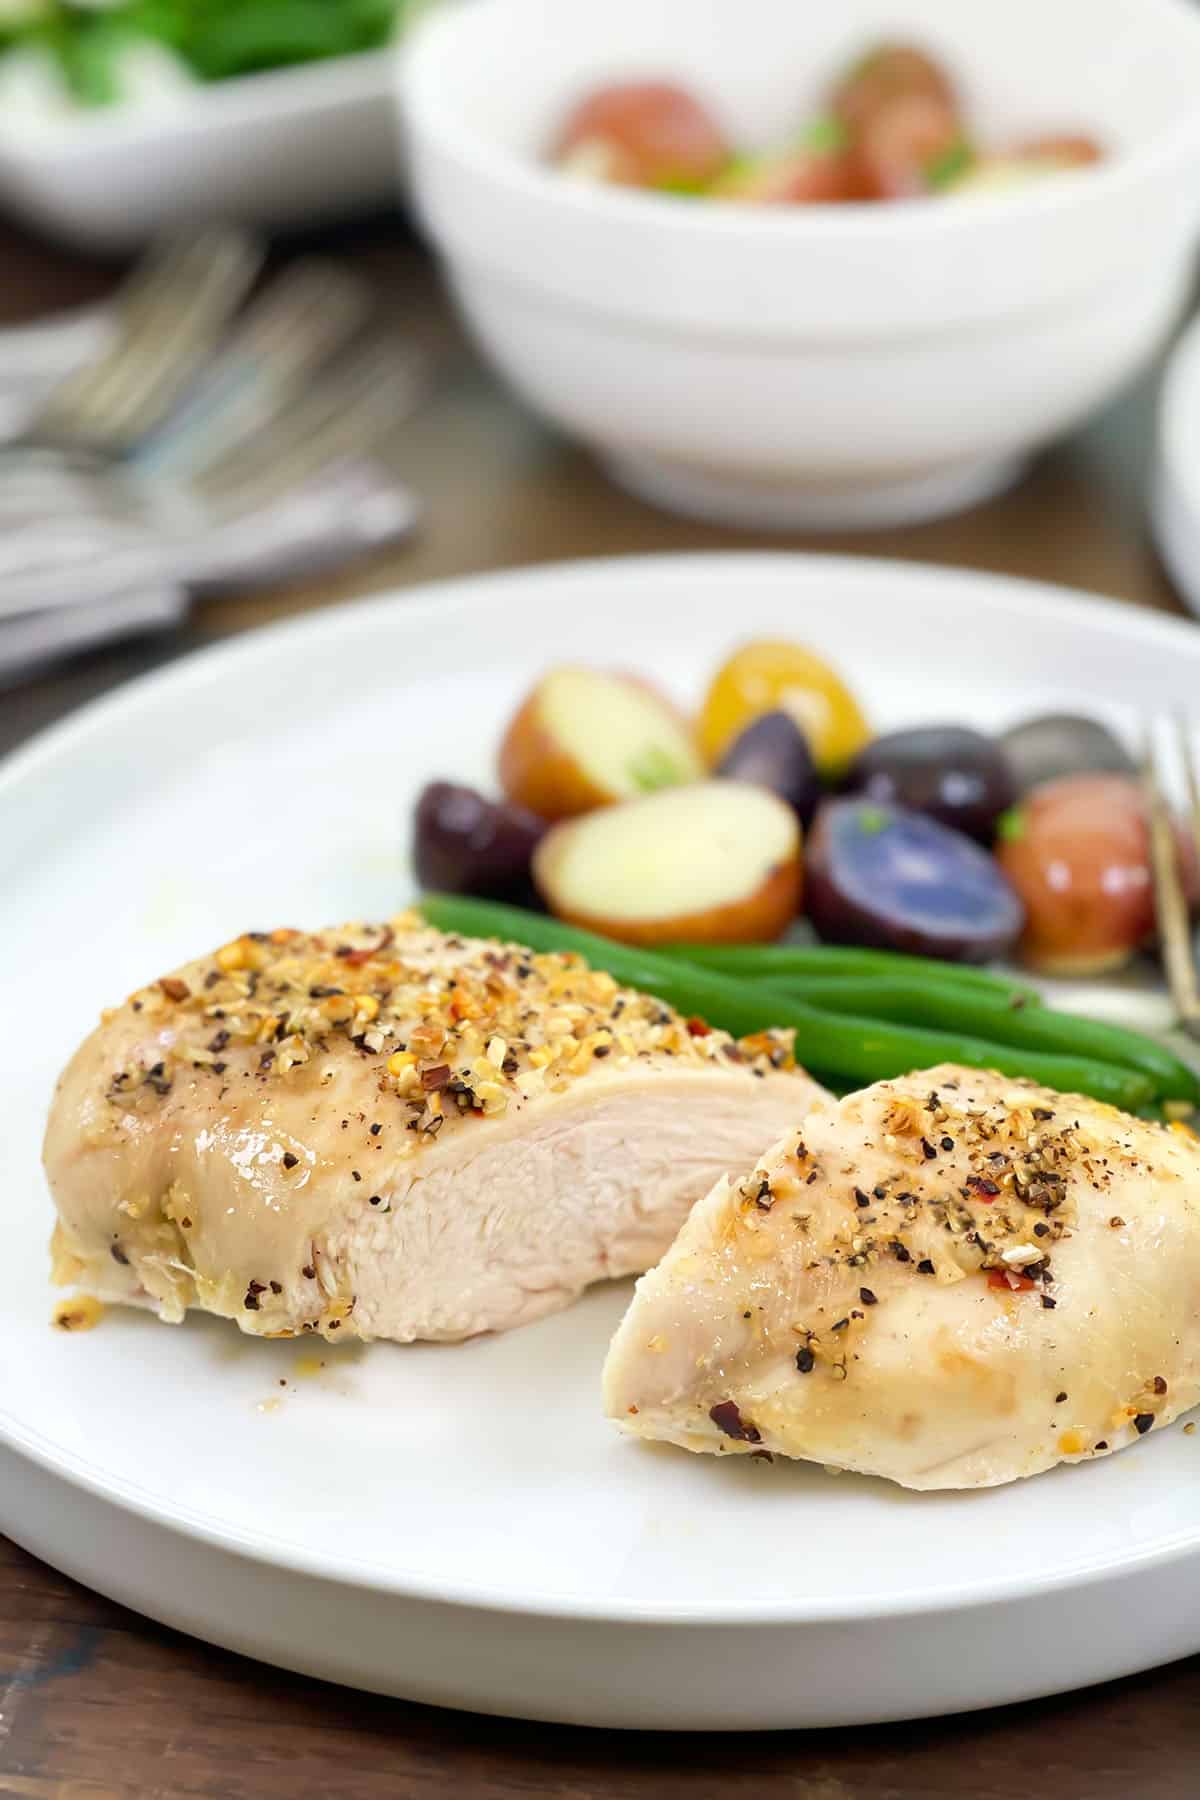
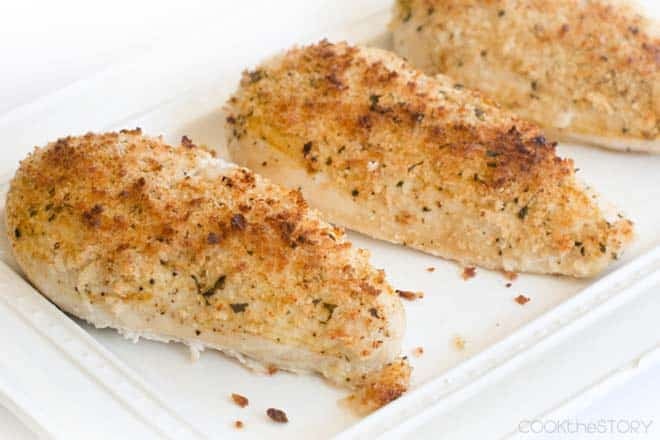
The salt brine adds a lot of flavor to the chicken breasts. But you can always add more! If desired, right before baking, sprinkle the chicken with your favorite seasoning blend or herbs and spices, like a pinch or two of paprika, ground cumin, or garlic powder. For the pictures used in this article, I went with some dehydrated garlic, dehydrated onion, and red pepper flakes.
Whatever seasoning you use just remember, the chicken has already been brined in salt, so you shouldn’t add salt, nor should you use a seasoning blend that contains salt.
Place the dish in the oven and bake for 20 minutes, or until an instant-read thermometer placed into the center of the thickest part of one of the chicken breasts registers an internal temperature of 160°F. Remove the dish from the oven and let that stand for about five minutes before serving.
Don’t skip the resting step. Letting the chicken rest allows the juices inside to settle down and soak in, so that they don’t come rushing out when you cut into the chicken.
Want to serve gravy with your chicken? Try my best chicken gravy recipe. Delicious! Or top your baked chicken with some of my flavorful Cowboy Butter recipe.
I really enjoyed doing the testing to perfect chicken breasts, and I can’t wait for you to try it. When you do, be sure to leave a comment below so that we can add more data to our results. Thanks and have a great day!
Podcast Episode: Baking Chicken Breasts
Listen to me explain briefly about how to make this chicken, with some great tips along the way, by clicking the play button below:
Listen to more Recipe of the Day episodes here.
Print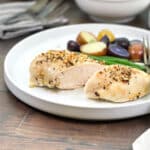
The Best Baked Chicken Breasts Recipe
- Prep Time: 15 minutes
- Cook Time: 20 minutes
- Total Time: 35 minutes
- Yield: 4 servings 1x
- Category: Entrée
- Method: Baked
- Cuisine: American
DESCRIPTION
Move over dry and bland boneless skinless chicken breasts! This recipe guarantees juicy, flavorful chicken breasts every single time.
Ingredients
- 4 Tbsp. Morton’s kosher salt
- 4 cups cold tap water
- 4 (6oz.) boneless, skinless chicken breasts*
- 1 Tbsp. olive oil
Instructions
- In a large bowl or zipper bag, stir together the salt and water until salt is dissolved. Add the chicken breasts.
- Leave the chicken breasts in the salt water for 15-30 minutes.
- Preheat the oven to 400°F.
- Remove chicken from salt water and discard salt water. Pat chicken dry with paper towels.
- Put chicken breasts onto a baking sheet. Add oil and turn chicken to coat evenly.
- Place baking sheet into oven and bake until chicken is cooked through to 160F as read on an instant-read thermometer, 20-25 minutes.
- Remove from oven and let stand 5 minutes before serving.
Love this recipe? I’d appreciate it if you could scroll down and add a *5 star rating* to help others know they’ll love it as well!
Notes
*If the chicken breasts are larger than 6 oz. you should cut them in half as instructed in the article above. Otherwise, the chicken breasts take too long to cook through, which results in the outsides being too dry from long exposure to heat.
Also, it helps the chicken breasts to cook more evenly if they are of an even thickness. If they are not, before brining them, pound them down a little bit between sheets of plastic wrap using a flat mallet or rolling pin, as explained in the article above.


I am trying this recipe this evening. I’m sure it will be 5stars. Thank you for all the work involved and concise info 😊
I hope you loved it, Evelyn! Glad the info is helpful for you.
Thank you for doing all this hard work to make my life easier. Today is the 3rd time I am following your method. I add the garlic and brine for 45 mins. Left over chicken made this way makes delicious chicken salad, too. I’ll never cook chicken without brining again. I’ve used your method for both boneless and bone-in chicken breasts.
You are very welcome, Susan! I’m so happy that you love the results so much. Thank you for sharing.
I’m about to try the brining and cooking. I appreciate your note about cutting in half and pounding as the two breasts are thick. Hopefully, they’ll turn out better than past recipes I’ve tried. Thanks for your clear and easy-to-follow recipe.
You’re very welcome, Gail. Happy to help!
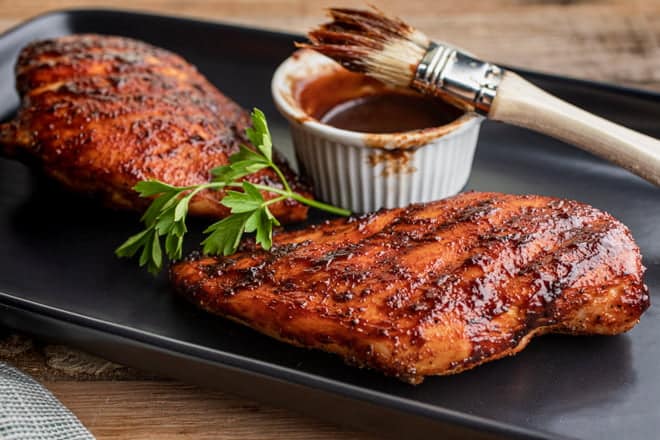
Can I use this baked breast recipe and bbq the chicken?
Louisa, yes. You’ll follow the same instructions for soaking them in salt water (essentially brining them), and then cook them over medium-high direct heat on your grill, flipping them occasionally, until they’re 165°F inside and no longer pink if you cut into them. Depending on their thickness, that will take 4-8 minutes per side. You can see more information about grilling chicken breasts here https://cookthestory.com/grill-chicken-breasts-that-are-juicy/
Note, if you were asking if you can bake the chicken breasts but add BBQ sauce to them, I’d say follow the recipe as written and then add BBQ sauce for the last 5-10 minutes of cooking so that the sugars in the sauce don’t burn. Enjoy!
Hi Christine-
I tried the brining and baking… the 1st time I have brined chicken breasts. I let them sit for 45 minutes. The meat turned out well- and yes, juicier. Very nice. No complaints!
They were a touch (though not unpleasantly) salty next to how I usually prep them before cooking (with a little soy sauce, garlic and onion powder). I may try 2 Tbsp of fine kitchen salt in the brine instead of 3 next time.
Also- I added 1 tbsp of garlic powder to the brine (I didn’t have granules). I think I can use substantially less of it dusting just the surface of the chicken- for the same effect.
Although I patted them dry before baking, they threw off some liquid while cooking. I may try the pan method next time to see how that differs. Baking gave no crust.
I go through a lot of skinless, boneless chicken breasts as a lean protein source- either alone or as an addition to other dishes. It’s always nice to learn some new approaches. Thanks again!
Thank you so much for sharing your detailed results with us, David! That’s fantastic and I’m sure will be interesting to other readers.
Thanks Christine, for very precise and thorough information. I am about to give it a go… from brining through to baking (my preferred method).
My appreciation for your doing all the work- then sharing what you found out!
David, I look forward to hearing how it all turned out for you.
Thanks so much for this. It’s great that you give step by step instructions and exact ingredient listings (the last time I tried brining I used table salt and left the chicken too long in the brine).
Can you tell me, should you pound the chicken breasts to even thickness before or after brining?
I suggest pounding the chicken to an even thickness before brining. So glad you found this helpful!
This worked perfectly, thank you!
You’re very welcome! :)
Awesome advice. Thank you for sharing.
You’re welcome, Beverly. Enjoy!
That gorgeous crust! My baked chicken breasts always end up dry, I’ve taken to just throwing them in the instant pot. It makes for luxuriously moist and flavorful chicken but there is definitely no delicious browning. I’m going to give baking them one more try following your recipe to the T. Wish me luck. :)
Good luck, Angelica! You can do it!