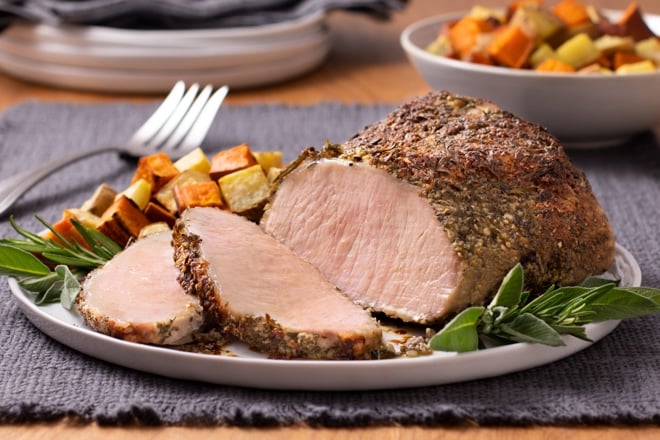
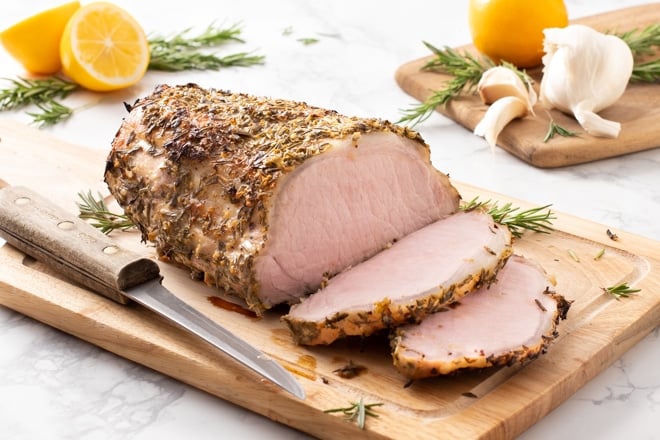
This method for roast pork gets you meat that’s juicy and tender on the inside but with a nice brown crust on the outside. It works perfectly every time!
- Video: How To Roast Pork Using The Reverse Sear
- How To Roast Pork Perfectly
- Ingredients
- Getting Your Pork Roast Ready For Roasting
- Cooking The Pork Roast On Low Heat
- Let The Pork Roast Rest
- It’s Time For The REVERSE SEAR!
- Can I Make The Roast Ahead Of Time?
- Storage Tips
- Frequently Asked Questions
- Podcast Episode: Roasting Pork Perfectly
- How to Roast Pork Perfectly

My favorite way to cook a pork roast is inspired by my favorite way to roast prime rib, which uses the reverse sear method from Serious Eats.com. To do the reverse sear, you cook the roast at a low temperature in the oven until it gets to the temperature you like. Then you let it rest for awhile. Then you put it into a really hot oven to get a nice crispy brown crust.
It might seem counter-intuitive if you’re used to searing your roast before cooking it. But I promise, it works amazingly well. So well that I’ve applied it to pork roast with the most amazing and perfect results. This is the only way that I roast pork now. The reverse sear is also my new favorite way to cook steaks. I’m pretty excited about it all!
Want To Save This Recipe?
Enter your email address & I’ll send this recipe straight to your inbox to save for later! Plus, you’ll get new recipe ideas from me every week!
So, today I’m showing you how to apply this same reverse-sear technique to roasting pork. You get a soft juicy inside (nearly as soft as slow cooker pulled pork) and all kinds of good crunchy meat and fat on the outside.
Video: How To Roast Pork Using The Reverse Sear
How To Roast Pork Perfectly
This how-to is for pork roasts that have some marbling. Look for a pork butt or a pork shoulder (boneless or with bone). Don’t try it with a loin. Just don’t. If you have a pork loin instead of a butt or shoulder, go here for instructions for roasting it perfectly.
Ingredients
So now that you know that the cut of pork we’re using, you need to know the size. Between 4 and 8 pounds is ideal. Other than that, there are only a few ingredients that you need for this pork roast recipe.
I keep my seasonings simple with black pepper, garlic powder, and salt. The only other thing we need is some low-sodium chicken broth. So easy.
Getting Your Pork Roast Ready For Roasting
1) Take your pork roast out of the fridge and let it sit at room temperature for 30 minutes to an hour. Preheat the oven temperature to 300°F.
2) If your pork roast has a thick layer of fat on the outside, cut all but a thin layer away so that it’s a thinner coating.
Tip: Don’t throw this fat out. Season it lightly with salt and then put it in a single layer in a cake pan (something with edges because a lot of hot fatty liquid is going to come out of it). Roast it in the 300°F oven until some fat is rendered. Drain off the fat and keep roasting until very crispy. Check it every 30 minutes or so. When it’s crisp and lightly browned blot it on some paper towel and then break it into pieces. Try hard not to eat it all yourself.
3) In a small bowl mix together 1 teaspoon salt, 1 and 1/2 teaspoons of pepper, and 1 and 1/2 teaspoons of garlic powder. That’s the right amount for a 5 lb. roast. If your roast is bigger or smaller, adjust the amounts accordingly. Sprinkle the seasoning mixture all over your roast.
Cooking The Pork Roast On Low Heat
4) Put the roast in a large roasting pan, fat-side-up. Add about a half inch of low or no-salt-added chicken broth to the bottom of the pan. Roast it uncovered.
How Long Do You Roast The Pork For?
You’re not aiming for a medium-rare pork here. You want that really tender meat like for pulled pork. But you don’t want it to be so tender that it actually pulls when you try to slice it. Aim for about 180°F internal temperature. That will be about 40 minutes per pound at 300°F.
Tip: Use an instant read thermometer to check it after 25 minutes per pound and then again every 5 minutes per pound after that. So if you have a 5 pound roast, you’ll check it after 125 minutes (about 2 hours) and then every 25 minutes or so after that. It will probably take 3 and 1/2 hours to get to 180°F.
5) When the broth evaporates and has left a light brown layer on the bottom of the pan, add more (or add water). Be sure to add enough liquid so that it goes back up the sides of the pan. This is to dissolve any brownings on the sides of the pan from the previous round of broth. You want all of this brown flavor in your eventual gravy.
6) Put the roast back into the oven. When the liquid level gets low again, add more liquid again.
Let The Pork Roast Rest
7) When the roast gets to 180°F, take the roast out of the oven and let it rest for 30-40 minutes. It will be fine for up to an hour. There is no need to cover it during resting time. This is important because this is the only time the roast will rest. Don’t skip this step.
You’re probably wondering if the roast is going to get cold during this long rest. It actually stays warm inside for a long time though. Also, you’re going to be putting the roast back into the oven for a bit and that will reheat it. Finally, it’s my general opinion that once you carve a roast, those slices tend to cool down pretty quickly no matter what you’ve done. The key is to have a lot of really hot gravy to pour over it all. That makes it all warm and delicious!
Tip: Use this resting time to finish off your other side dishes and make the gravy using that gorgeous brown liquid from your roasting pan. Here’s my method for making a perfect gravy using drippings like the ones you have from this roast.
It’s Time For The REVERSE SEAR!
8) Preheat the oven to 475°F.
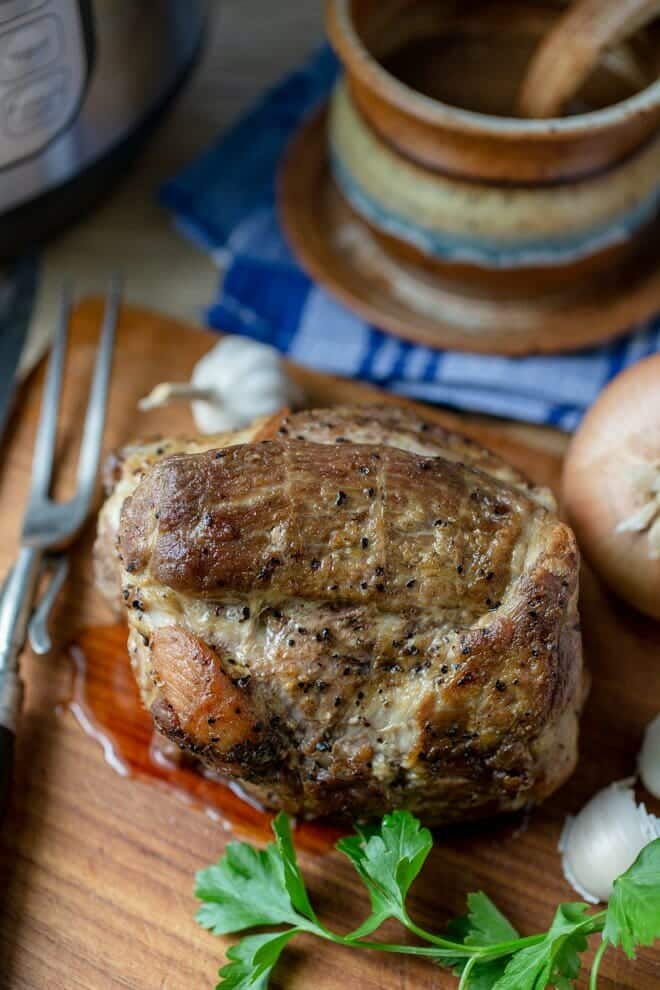
9) Put the roast onto a clean baking sheet, or rinse out the roasting pan it was previously in and use that. Put it into the hot oven for 13-17 minutes, uncovered. You want the outside to get really nice and brown and the fat to get crunchy.
10) Carve immediately and serve. Don’t rest it when you take it out. It already rested earlier. Just get carving and eating!
Tip: Use an inexpensive electric carving knife like this one to carve roasts. It shreds the meat less and you can get thin slices with an even thickness.
Isn’t that the coolest way to roast pork? It’s low and slow so that it’s tender and juicy, just the way you want it. And the outside is all brown and crunchy and full of flavor. I’m never going to roast pork another way.
Can I Make The Roast Ahead Of Time?
YES! My parents’ restaurants used to do a lot of catering when I was a teenager, and so I did a lot of catering alongside them. What we used to do for turkeys is exactly what you should do for this roast pork recipe if you have a crowd coming over.
A day ahead, roast the pork. Follow the instructions above and roast it slowly at 300°F, then let it rest, then do the reverse sear, but then let it rest again. Let it rest until it’s cooled down quite a bit.
Next you want to refrigerate it whole until chilled. This makes it really easy to get nice even slices because slicing it cold there are less juices flowing and everything holds together better.
Use an inexpensive electric knife, if you have one, to get nice thin slices. A carving knife works too just not as well and it gets tiring if you’re doing a lot of slicing.
Arrange the slices in a single slightly overlapping layer on a large sheet pan. 40 minutes before you’re serving dinner, dribble water or chicken stock over the pork slices.
You want about 1 drop of water for every 3-4 slices. Very little water, really. But the water is going to heat and steam and keep the roast juicy. Next, cover the sheet pan with foil and then put it into the oven at 300°F until just heated through, about 25-30 minutes. Serve.
If you want to keep several trays of meat warm while serving, you can do that. Heat the trays all together in the oven at 300°F for 30 minutes. Then drop the heat down to 200°F so that you’re just keeping them warm and not at risk of them actually cooking or starting to dry out.
Storage Tips
I like to carve the entire roast and store it in the fridge in slices. The slices are easier to grab to use than having to haul out the whole roast and cut it every time. Put the slices in a sealed container. They’ll keep for 3-4 days in the fridge. Or you can put them in a freezer bag and freeze them for a month.
Frequently Asked Questions
I answer a lot of questions in the comment section at the bottom so do read those, but here’s a summary of the most frequently asked questions.
As long as the roasts are not touching and there is room for air to circulate between them, the roasting time does not need to be adjusted. Weigh each roast on its own and determine how long it will take. The cooking times for each roast will be independent of the other roast there.
Here is my tutorial for making gravy. This recipe uses the liquid from the roasting pan. If you want to make the gravy ahead of time, you totally can. Use this recipe for making gravy without drippings. Then, if you want to, you can add some of the liquid from the roasting pan while the roast is resting.
Yes, you can use a brine or a marinade. I honestly don’t think it’s needed for the tender juicy cuts used here though(the butt and shoulder). It’s more beneficial when doing a leaner cut like a loin or tenderloin. If you do brine the roast, you won’t be able to use the liquids that drip out of it during roasting. They’ll be too salty. You’ll need to use the Gravy without Drippings recipe.
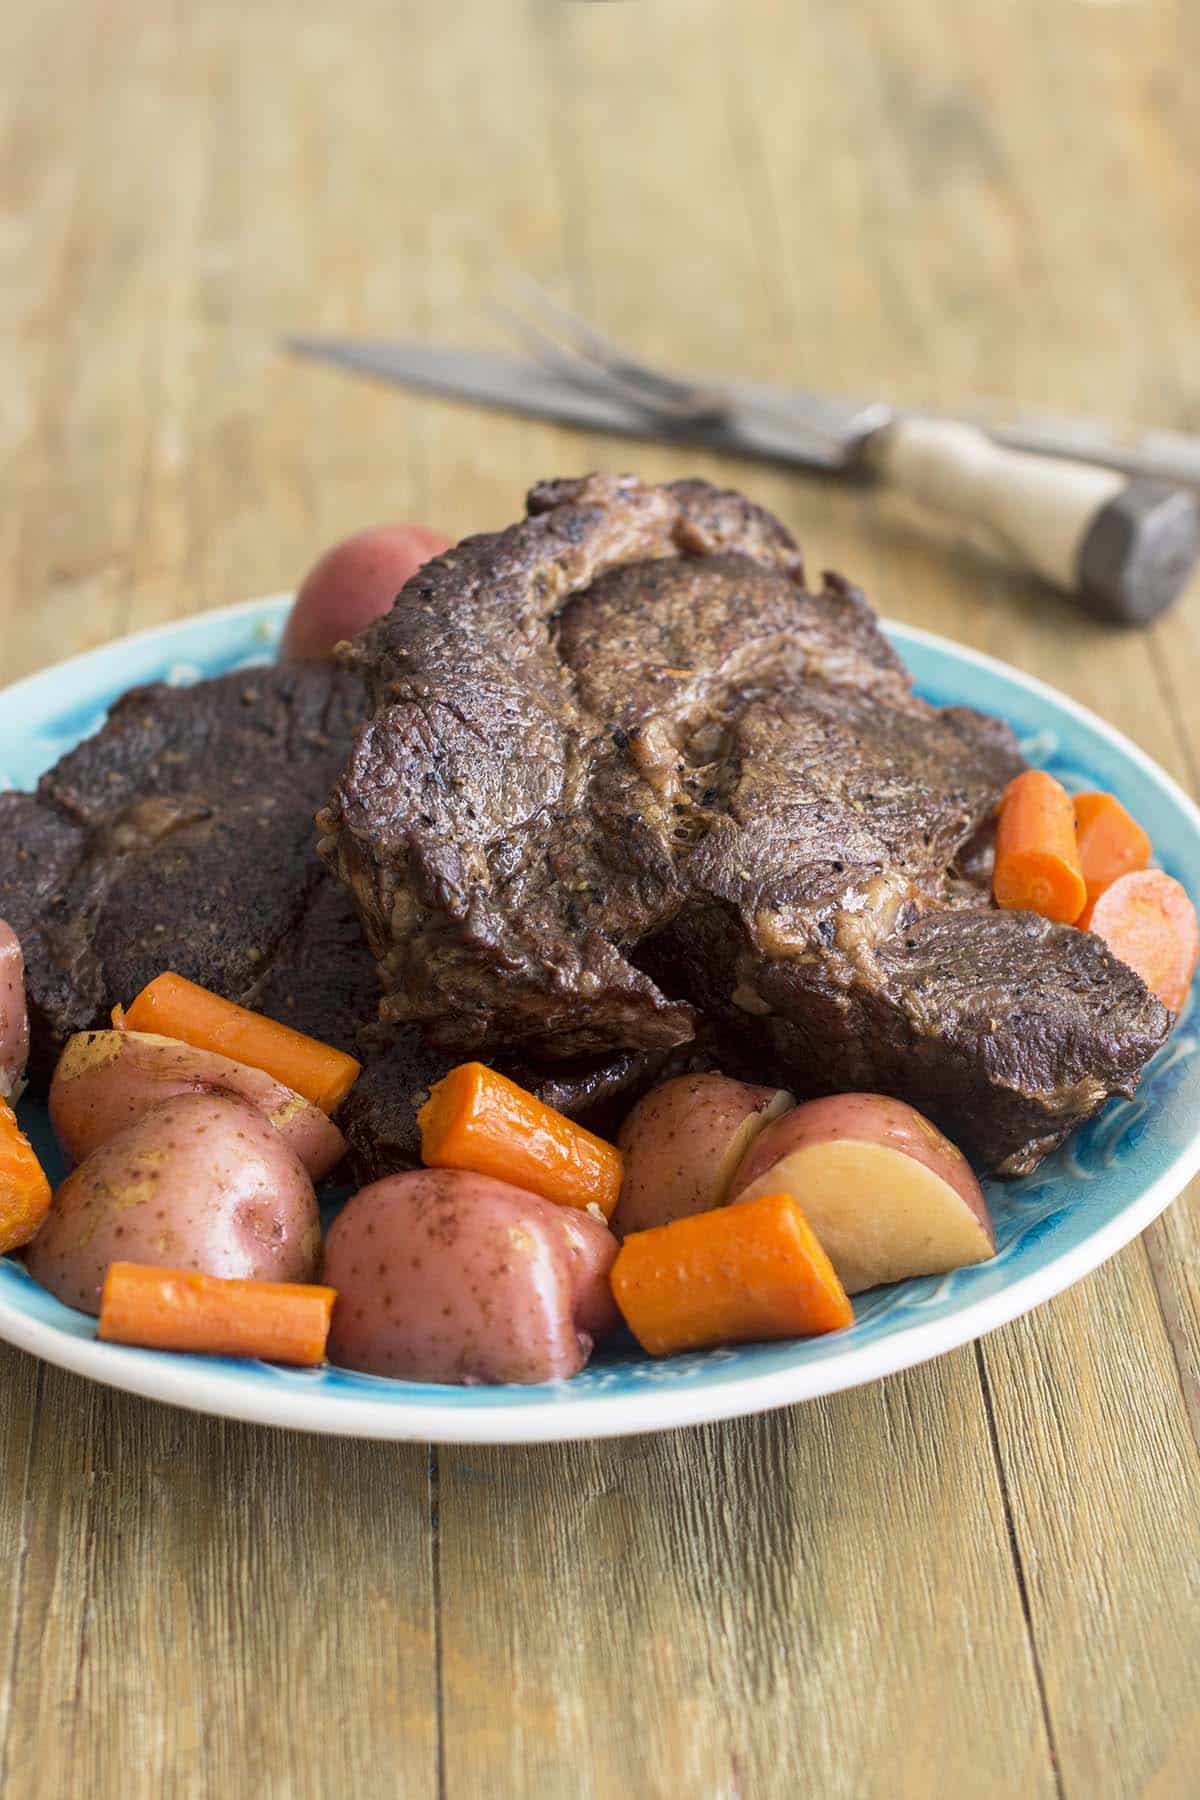
Yes. But then skip adding the liquid to the pan. You want the vegetables to roast, not boil. Arrange potatoes or other root vegetables around the roast in a single layer for the last hour of cooking. While the roast rests, you can put the veggies in a low oven to keep them warm, or you can let them keep roasting at a higher temperature to get a crust on them. Note that you won’t get any drippings for gravy since the vegetables will soak up all the fat and juices from the roast. That’s not a bad thing at all. Just go ahead and do the Gravy without Drippings mentioned above.
Once you have the leftovers, you can do all kinds of things with them. You can use them anywhere you’d use cooked chicken. Put them on a salad or in a sandwich or wrap. They’re great on a bun with BBQ sauce, like pulled pork sort of. You can mix them with any pasta sauce and serve with pasta. It’s great chopped up and put with rice, like Chinese fried rice, or even white rice with peas and pork. The possibilities are endless!
Podcast Episode: Roasting Pork Perfectly
Listen to me explain briefly about how to make this amazingly perfect Roast Pork Recipe, with some great tips along the way, by clicking the play button below:
Listen to more Recipe of the Day episodes here.
Print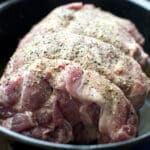
How to Roast Pork Perfectly
- Prep Time: 30 minutes
- Cook Time: 3 hours
- Total Time: 3 hours 30 minutes
- Yield: 6–12 servings 1x
- Category: Entrée
- Method: Roast
- Cuisine: American
DESCRIPTION
This is a method for how to roast pork so that it is juicy and tender on the inside and has a gorgeous brown crust on the outside. It works perfectly every time! Note: If you have a pork loin instead, get instructions for cooking it over here.
Ingredients
- a boneless or bone in pork butt or pork shoulder (4-8 pounds is ideal)
- 1 and 1/2 tsp. black pepper
- 1 and 1/2 tsp. garlic powder
- 1 tsp. salt
- low or no-sodium chicken broth
Instructions
- Take your pork roast out of the fridge and let it sit at room temperature for 30 minutes to an hour. Preheat oven to 300°F.
- If your pork roast has a thick layer of fat on the outside, cut about half of it away so that it’s a thinner layer. You can throw this out. Or, the best thing to do, is to turn it into a snack to have while your pork is roasting. Put the fat that you removed from the roast in a single layer on its own cake pan. Use a pan with edges because a lot of hot fatty liquid is going to come out of it. Season it lightly with salt. Roast the layer of fat in the 300F oven until it’s brown and very crispy. Check it often. Blot it on kitchen towel. Break it into pieces and offer it as nibbles to anyone who is lured into your kitchen by the roasting pork smells.
- Meanwhile, mix the pepper, garlic powder, and salt in a small bowl and then sprinkle liberally all over the roast.
- Put the roast in a large roasting pan, fat-side-up. You do not need to use a rack in the pan.
- Add about half an inch of low or no-sodium chicken broth to the bottom of the pan. Put it into the oven, uncovered.
- Cook for 40 minutes per pound or until an instant read thermometer reaches 180F. This may seem high for pork but your goal is really tender, slow-cooked pork, almost like the texture of pulled pork.
- If at any point most of the broth has evaporated, add more. Add enough to cover any brownings on the side of the pan from where the previous broth evaporated away. This will dissolve those brownings and flavor your gravy.
- Take the roast out of the oven. Transfer it to a plate so that you can get at the roasting pan and make your gravy. Let the roast rest for 30-40 minutes. This is important because this is the only time the roast will rest. The roast does not need to be covered during resting time. Use this time to make your gravy. (Here’s how to make gravy using the flavorful broth from the bottom of the roasting pan) and to finish off your other side dishes and set the table.
- Preheat the oven to 475F.
- Once the roast has rested, and the oven has preheated, and once you have everything else for your dinner just about ready, put the roast into a clean roasting pan or onto a baking sheet, uncovered, and put it into the hot oven for 13-17 minutes. You want the outside to get nice and brown.
- When it’s really nice and browned, take the roast out of the oven and immediately carve it* and serve it. Do not let it rest now since it has already rested.
Love this recipe? I’d appreciate it if you could scroll down and add a *5 star rating* to help others know they’ll love it as well!
Notes
*Tip: Use an inexpensive electric carving knife like this one to carve roasts. It shreds the meat less and you can get thin slices with an even thickness.
Disclosure: This post contains Amazon affiliate links. If you click on one and buy something, I receive a small commission at no additional cost to you. All opinions are my own.
This post originally appeared in December 2014 and was revised and republished in October 2022.


I fixed this Pork Roast about a couple of weeks ago…as you did, and it was “Amazing”…..needless to say I had purchased another Pork Roast and guess what? it’s in the oven as we speak…..We love, love love it….thanks for sharing………
You’re welcome, Loretta! So happy to hear that!
Tried this roast last night from a gree one we got for a bonus for thanksgiving.I have been searching for a long time for this recipe. Tender and juicy with a great crust
. Did like your mom says spice it, do again then one more time. I love my meat ŕeally salty and this was bombdickety!Thank you so much Randall
So happy you enjoyed, Randall!
Great technique for pork shoulder roast. I rubbed my pork in garlic, olive oil, fennel seeds, and herbs from my garden. I ran out of time on Thanksgiving and skipped the reverse sear. The roast had already browned nicely and did not need it in my opinion. Thanks for helping me skip the boring turkey this year!
You’re welcome! Sounds delicious.
I like reverse searing roasts, but 180 is too far past well-done for my pork roast. 160 is the max temp for modern pork (even ground pork), and I cook the roast at 250-260 and pull it at 150 since it cooks a bit more after taking it out- usually around 5 degrees.
Also, you definitely CAN make gravy with a brined roast. You simply adjust the salt accordingly. I use apple cider, white wine, and homemade stock, and season to taste at the end. Brining is MORE important to do with a roast than a tenderloin because it seasons deeper into the large format cuts, and also kills bacteria, obviously important to consider when cooking pork.
Thank you for sharing your thoughts with us, Christopher.
This recipe turned out beautifully! It cooked in exactly the amount of time and was tender, juicy and flavorful. It also didn’t need browning at the end because my roast was wrapped in pork belly and got crispy brown. Thanks for a foolproof recipe!
You’re welcome, Elizabeth! That sounds wonderful.
I don’t cook much & never cooked a pork roast. I happened upon your recipe & thought “How hard can that be?”
Well it was super easy, & came out just as described! And my mom said it’s the best pork roast she’s ever had!!
Will definitely try this method with steak as well…
I’m so happy, Laurie! Glad it worked well for you!
Hi – is it ok to let it cool completely before doing the reverse sear at the end? For example, if I want to make it a couple hours before earing it, can I let it rest for a while until I’m ready to reverse sear, or do I have to do the reverse sear after resting for 30 minutes?
I assume it may need to ‘sear’ for longer if the temperature has dropped….curious what your thoughts are. Thanks!
Kenny, it really depends on the size of the roast and on food safety here.
The issue is first, whether the roast will still be hot inside, and second, whether it is safe to eat. So, if it’s a big roast, then it will stay hot for quite a long time and so you could let it rest for a good hour or more and it would still be hot inside. Then when you do the reverse sear, you’ll get the crust on top and a bit of extra heat to warm the roast through a bit more. If it’s a smaller roast, that extra-long resting time will have the roast not very warm inside. Even the sear at the end likely won’t warm it through. And so your roast could be less than good, room temperature. Having said all of that, I would not recommend that you leave meat on the counter for longer than 30 minutes. It can too easily get into that danger zone of a temperature where bacteria grows quickly and that isn’t safe. I hope that helps!
I was skeptical until the end because of the 180 degree cooking temp, but this roast was awesome!! Tender inside, and nicely crispy outside. The gravy i made from the drippings was also delicious. Thanks!!
You’re welcome, Andy! I’m glad you trusted the process and enjoyed. :)
Instead of doing all this trimming and broth pouring mambo-jumbo, just slice that fat on top of the pork with a knife into squares, deep almost to the meat, you will save yourself time and flavor! The rest is just – season it with whatever you like, but salt and pepper a must! Then shove some whole garlic in all nooks and crannies you can find, put on a shallow pan in to the oven on high 450f for about 20min to get the crust and then drop it to 300-325f for about 45 min per pound. Until 180f inside meat temp. And finish it with 5-10min on high broil. You gonna have crunchy, tasty fat on top and pan full of fat and juice, in which that piece of meat was laying all this baking time and enjoying its bath, Enjoy!
Thanks for sharing your method with us!
This is the very best pork roast I have ever had.
Thank you, Vickie! So glad you enjoyed.
Hi Christine, I had a 6 lb. Pork Shoulder Butt taking up a lot of room in the freezer and got tired of jockeying it around the limited space. Ended up here because your recipe is so simple… sort of like a cook it and forget it… for hours. The roast turned out so juicy, tender and delicious. I skipped the step of searing the meat because the family was so hungry and the crust was really awesome. The pork roast reminds me of a now closed restaurant in San Francisco known for their roast pork plate smothered in gravy and rice.
That’s wonderful, Laura! Thanks for taking the time to share with us.
This is a great tutorial for roast pork. I never knew about the reverse sear and it worked great! Very yummy results!
Thank you so much, Wendy! So happy it worked well for you.
Hi Christine. I was wondering if you had tried this method with pork cooked in the instant pot. Am tempted to try it or, do you think it would be too “wet”. Thanks
Absolutely, Niki! We’ve got Instant Pot instructions here – https://cookthestory.com/instant-pot-roast-pork/ You can finish it in the oven after resting to crisp up the outside if you’d like.
It was very very good thank you for the recipe. I appreciate it!
You’re very welcome, Shirley!
Can’t seem to reply to my earlier comment asking about finishing an instant pot roast this way, so am leaving a new comment.
This was EXCELLENT. So succulent and still lovely and juicy as leftovers the next day. Put pumpkin and potatoes in the pan drippings to roast while the oven was coming up to temperature and the meat was resting and finished them off together. Friend made gluten free gravy from the pan drippings and reheated both the next day but l prefer my leftovers cold in a sandwich.
Took longer that stated and had to increase the temperature by 100 degrees F but l’m waiting on parts for my proper oven so made it in a bench top oven of dubious reliability temperature wise. Will definitely make it again when the real oven is working next week.
Thanks for sharing with us, Niki!
*heat to 180 not cool duh
yup, this works really well! Don’t be so scared to cool this to 180 – slow cooked, that makes it more tender by far than if you stop at 150 or 160.
Thanks, Lee! Glad you enjoyed.
You want to cook the roast to an internal temperature of 180F and then let it rest and then put it back in the oven?
That is the DUMBEST THING I HAVE EVER HEARD. Who the hell wants to eat dried out pork that’s 190F at the end? Jesus Christ. That the roast out at 150F let it rest it will go to 155, put it back into the oven it will go to 160 and that’s the ideal way to do it.
Thank you for sharing your thoughts, Konrad, but as you can see in the comments, lots of our readers do enjoy this method.
Ive always been a beef person, but found a boston butt in sale and decided to but it with the prices of beef being astronomical(at least in my area). Ibe never had anything like this before, my husband who is the pickiest person you would ever meet(seriously wont eat anything with tomatoes, mayo, celery seed, caraway seed) loved this, as did my daughter. This would definetly win a medal at a cook off. I will never do pork roast any other way. Just wow. It came out so juicy, tender, and the fat was crispy and crunchy. Just wow!
That’s wonderful, Jennifer! So glad this was a hit with the whole family. :)
I made this recipe once Snd my husband has requested it again. This one is going in our Family Favorites cookbook! Thank you so very much!
You’re welcome, Patricia! That’s high praise and I’m so happy your family will enjoy this over and over.
This is the most delicious pork recipe I have EVER made. Thank you so much! The only adjustment I made was to reduce the salt and pepper slightly to my own taste. The results are fabulous and will forever be a family favorite!
Thank you so much, Jan!