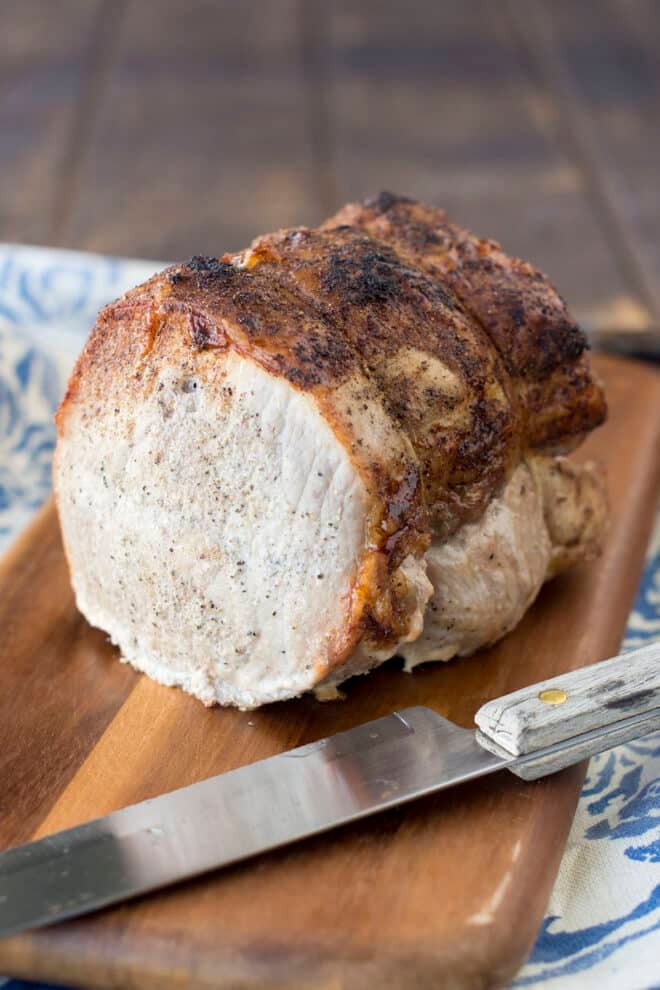
A delicious method for roasting pork loin that is juicy in the middle and brown and crusty on the outside.
Awhile ago I posted my method for roasting pork perfectly. That pork roast recipe has gotten a lot of great feedback in the comment section. There are also a lot of questions there too. One that comes up often is whether you can use the same method on pork loin, or just on pork butt as the recipe calls for.
My answer is always no. Pork loin is much leaner than pork butt so if you cook it in the long method I used, you’d end up with very dry pork roasts. Because I get asked about it often, I decided to test out some ways of roasting pork loin and share the best with you here in my juicy Oven-Roasted Pork Loin recipe.
Want To Save This Recipe?
Enter your email address & I’ll send this recipe straight to your inbox to save for later! Plus, you’ll get new recipe ideas from me every week!
Ingredients
You don’t need much to make a delicious and juicy pork loin.
- Pork loin roast, 3 – 5 pounds
- Black pepper
- Garlic powder
- Salt
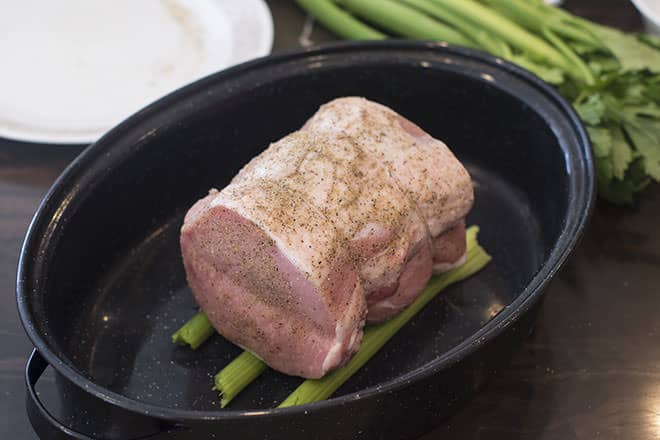
You’ll also need an oven-safe rack to set the pork loin on with it roasts. If you don’t have one, a few ribs of celery will work. The idea is to allow the hot air in the oven to circulate under the roast. You’ll also need a roasting pan (a casserole dish larger than the roast will work) and some aluminum foil.
Video: How To Roast Pork Loin Perfectly
How To Roast Pork Loin In The Oven
Step #1:
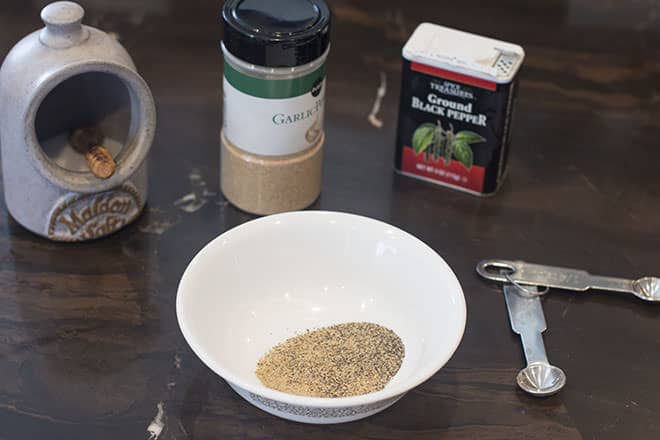
If you’d like to start by brining your pork, you can find my instructions and tips for How to Brine Pork Loin. Otherwise, start by preheating the oven to 350°F. Mix together 1/2 teaspoon black pepper, 1/2 teaspoon garlic powder, and 1/4 teaspoon salt.
Step #2:
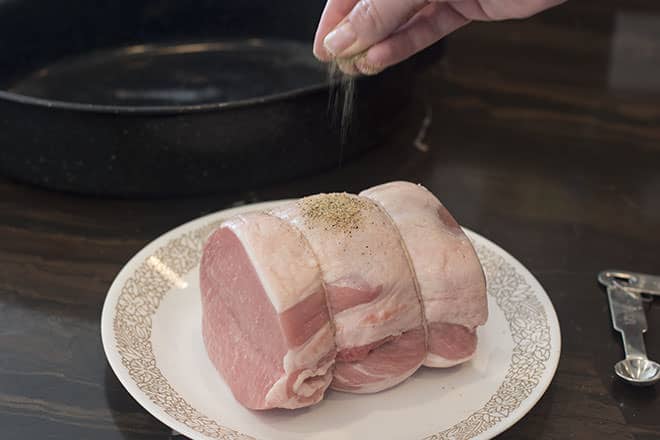
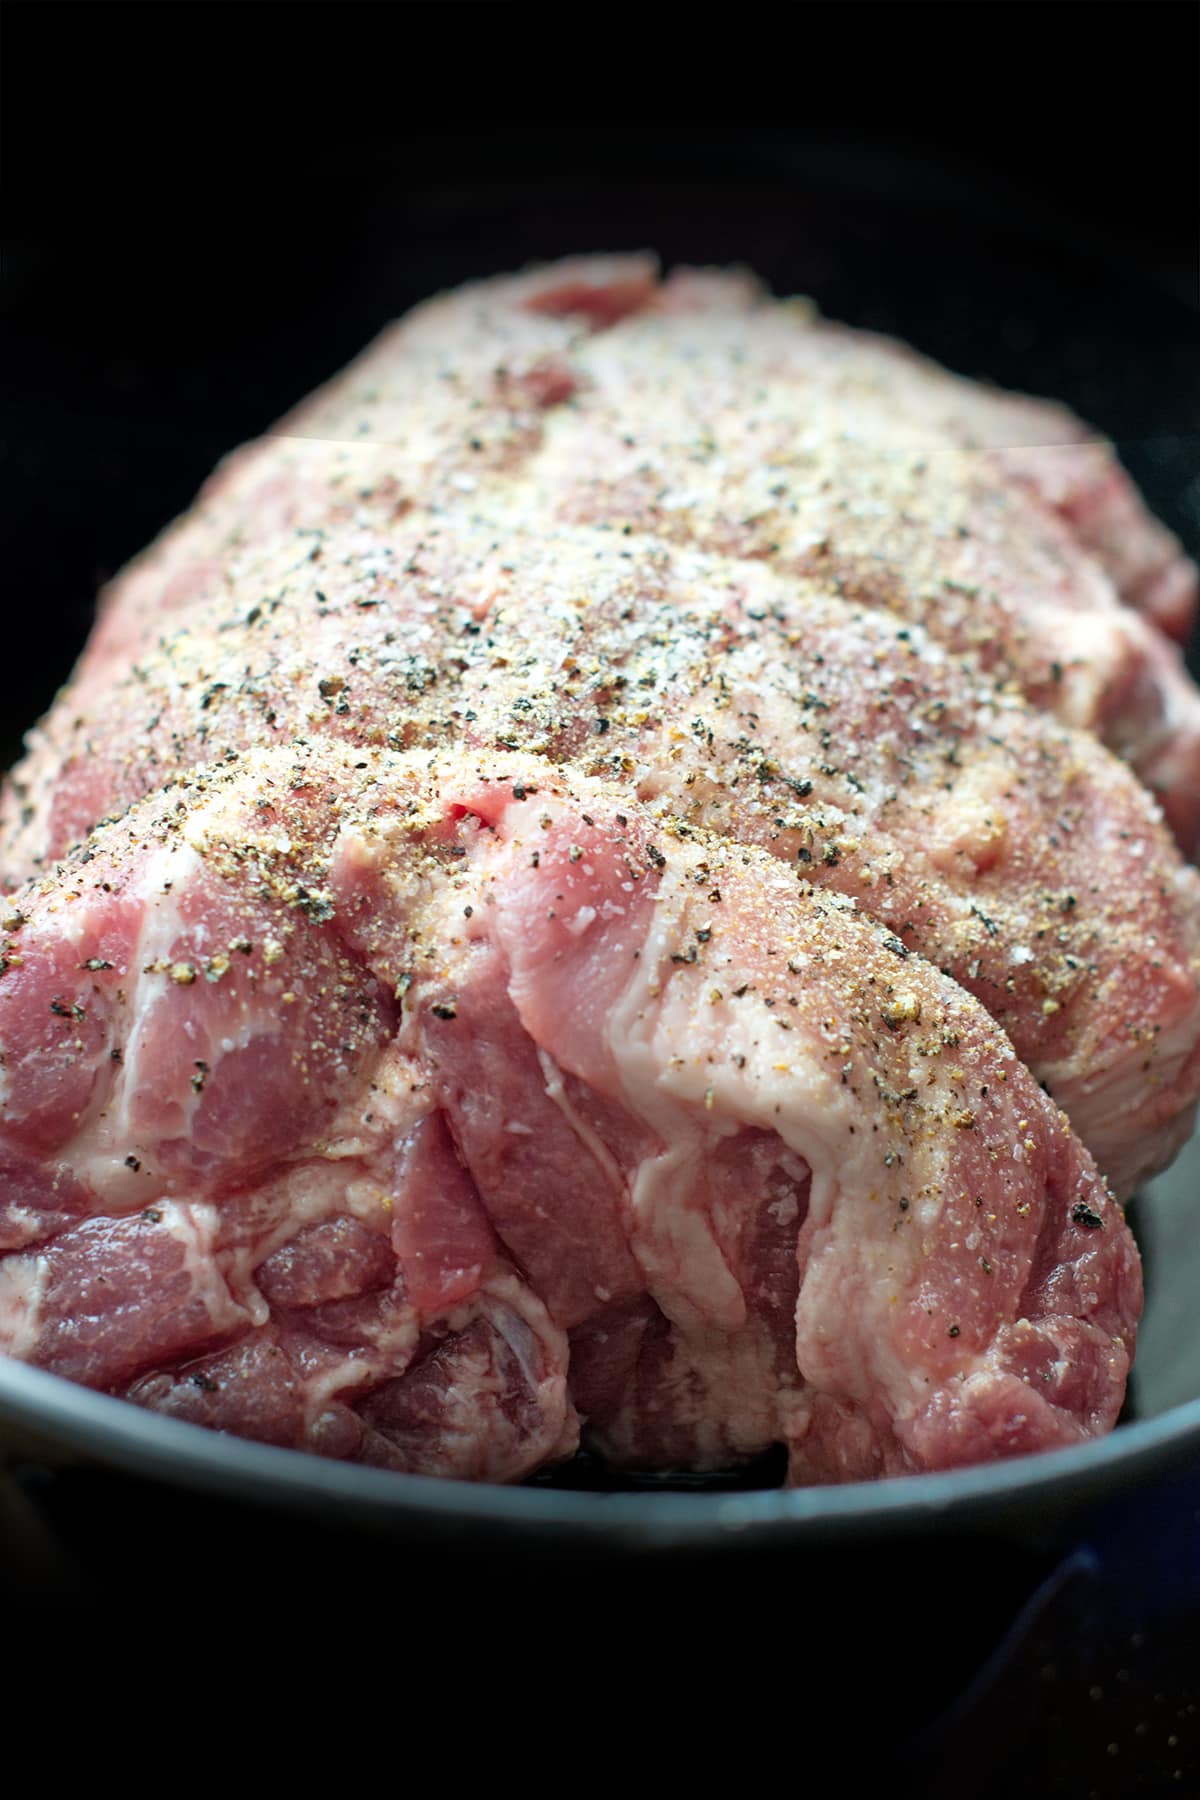
Sprinkle it all over the pork loin roast.
Step #3:
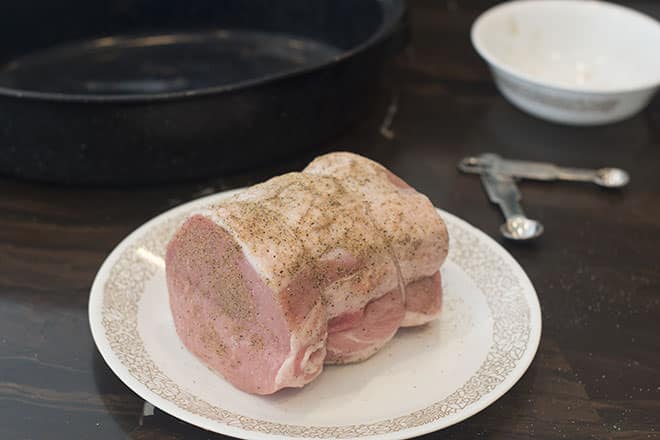
Rub it all over until it’s coated.
Step #4:
Put the roast on a rack in a roasting pan. If you don’t have a rack that fits in your roasting pan, use 3 stalks of celery like this:
Step #5:
Put the roast into the oven.
Step #6:
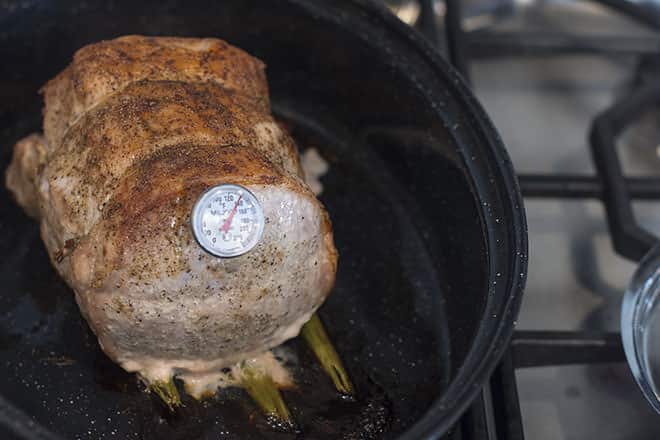
Roast until the internal temperature is at 130°F-150°F. That will take 18-28 minutes per pound at 350F. You should start checking it after 18 minutes per pound, and then every 10-15 minutes after that. Note that the final temperature by the end of this recipe will be at least 145F, which is the lowest safe temperature for pork. If you want it to be at that temperature, you will take it out at 130F at this stage. If, on the other hand, you don’t like your pork to have any pinkness visible, then you will want the final temperature at the end of the recipe to be 160F, so you will take it out at 150F now. The resting and final cooking will bring the temperature up.
Tip: An instant read thermometer is the best way to make sure you have the perfect cook and are at a safe temperature.
Step #7:
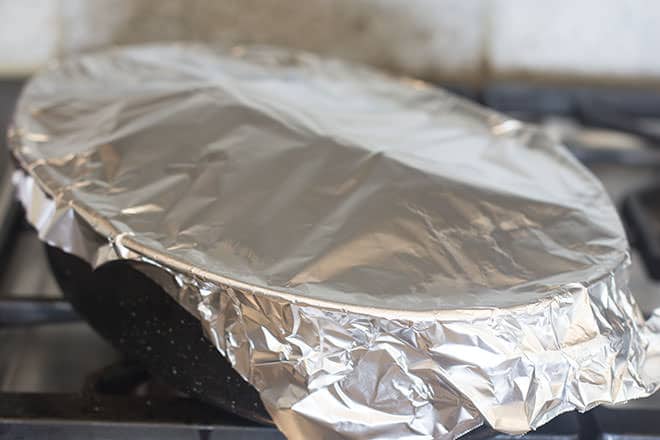
Cover roasting pan with foil and let rest for 30 minutes.
Step #8:
Heat oven up to 475°F. Uncover roast and remove the thermometer. If there are any drippings in the pan, you can pour those out to make gravy (see below). Alternatively, you can move the roast out of the pan, swirl some stock or broth around in there to loosen up any drippings, and then pour that out to use for gravy.
Then, either wipe the pan out well, or put the roast into a clean pan, and finally, roast for another 10 minutes. Test the pork to make sure that it is the temperature that you like, and that it is at least 145F.
Note that the clean pan or wiping is needed mostly to help with clean up later. This is because any brownings or traces of liquid left in the pan from the original round of cooking will cook to the pan when they hit the high heat, making them hard to wash off. Using a new pan, or wiping the pan well, will make clean up much easier.
Step #9:
Use those 10 minutes to make gravy, if desired. If you got nice roasting juices from your first roasting pan, then you can make my Pork Gravy recipe. If you didn’t get juices, then here is how to make gravy without drippings. Remove roast from oven, carve, and serve immediately.
Temperature and Time For Pork Loin
Some people like their pork really well cooked. This is because it used to be recommended that pork be cooked to 160°F. People got used to pork like that and continue to prefer it very white and drier, versus slightly pink and moist. If that’s you and you need your pork more well done, then go with a final temperature of 160°F. That will be 20-25 minutes per pound for a 3-5 pound roast, and 11-15 minutes per pound for an 8-10 pound roast. You’ll take the roast out when it is at 150F and then let it rest, and then do the final high heat in the recipe. The resulting temperature will be 160F.
If you prefer it juicy and very slightly pink at the center, then go with 145°. For a 3-5 lb. roast, this will be 18-23 minutes per pound , whereas for an 8-10 pound roast it will be 8-11 minutes per pound. You’ll take the roast out when it reaches 135F and then let it rest, and then do the final high heat cook. The final temperature will be 145F. These are the correct times and temperatures according to the the National Pork Board.
The reason why the number of minutes per pound decreases is because of the cylindrical shape of the roast. Bigger pork loin roasts are longer but not thicker. The heat doesn’t take longer to reach the center of the roast from the outside in as the roast gets longer, and so the time per pound is reduced as the roast gets heavier.
Pork Loin Vs Pork Tenderloin
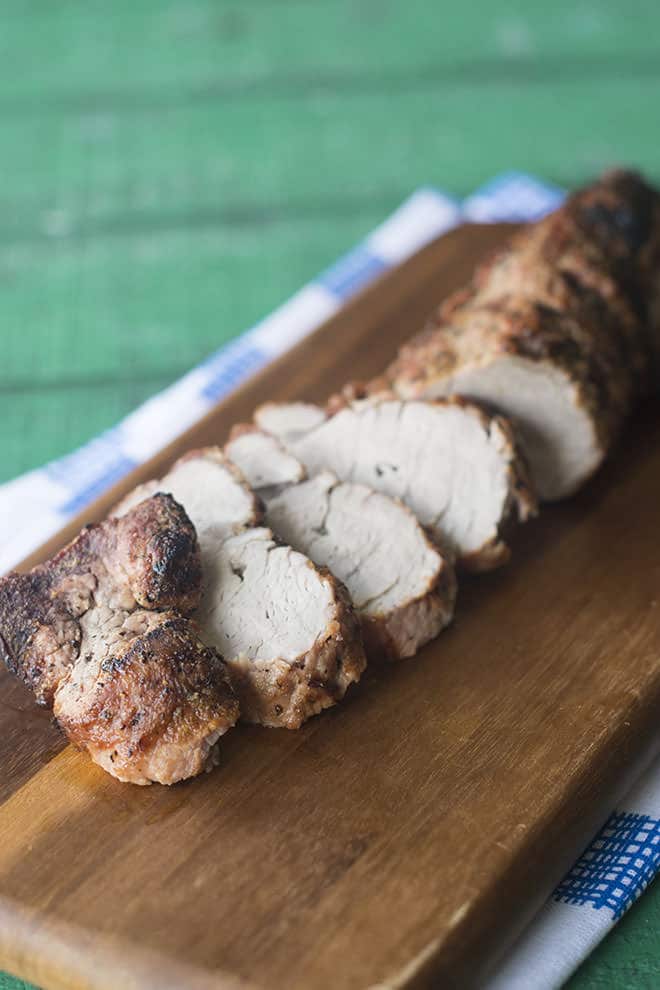
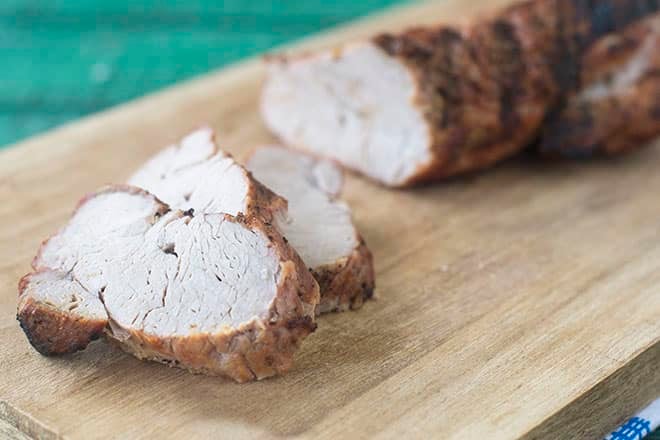
First, just to be clear, I’m talking about boneless pork loin today, not about pork tenderloin. We’re also not talking about pork butt or pork shoulder. These are all different cuts of pork and require different times and temperatures. If you’d like to know how to prepare these other cuts of pork, I have that information for you here:
- How to Cook Pork Tenderloin
- Perfect Roast Pork (using Pork Butt or Pork Shoulder, with or without the bone)
- Boneless Pork Butt Roast
- Bone-In Pork Picnic also called Pork Shoulder
Now onto the loin!
What Is The Reverse Sear For Roasting Meat?
Like with the roasted pork butt, I use the final-sear method that I first learned from roasting prime rib according to Serious Eats’ instructions.
Basically, you put the roast into a moderate or low oven (I used 350°F for the pork loin). You take it out when it reaches the correct temperature (145°F for pork loin), then cover with foil and let it rest for a good 30 minutes. This lower temperature cooking and the rest time, keep the pork loin nice and juicy.
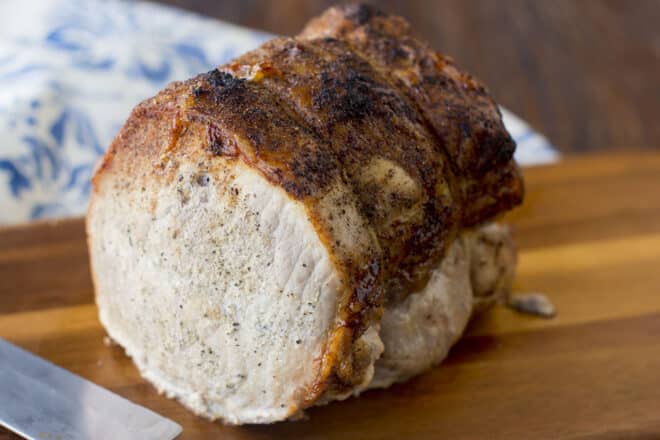
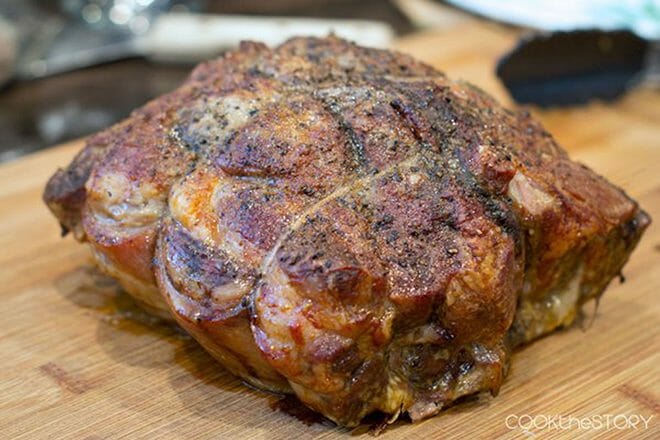
Finally, you crank up the oven really high (475°F) and give the roast a last blast in there for 10 minutes. That extra heat really browns and crisps up the outside of the roast, for extra flavor and texture, while not penetrating into the roast to take away the juiciness we created earlier. Then you carve it immediately and serve. No need to rest it again because the inside of the roast already had its resting time. Pretty cool, right? We’re going to use this technique here and you’ll see that you get juicy pork loin (which is often hard to accomplish) while still having a nice crust.
Frequently Asked Questions
I’ve gotten a lot of questions about roasting pork loin in the comment section below. Here’s a summary of the most common questions with my answers.
Yes. Use a large roasting pan so that there’s space. In a large bowl toss together cut up potatoes and carrots (you want them all in about 1/2 inch pieces) with enough olive oil to lightly coat them, and some salt and pepper. For the last 45 minutes that the roast is in the oven at 350°F, scatter the potatoes and carrots around the roast. They should be in a single layer, not piled on top of each other. Take them out when you take the roast out to rest. Keep the veggies warm or let them rest and then return them to the hot oven with the roast for that last blast of heat.
No. Different cuts of pork have different shapes and sizes, but more importantly, they have different levels of leanness. The way you cook a larger lean cut like a loin is different from how you cook a small lean cut like a tenderloin, and is also different from how you cook a large fattier cut like a pork butt. This recipe is specifically for the shape and leanness of pork loin. If you have pork butt or pork shoulder, please use this recipe. On the other hand, if you have pork tenderloin, which is different from pork loin, head over here.
Yes. Here are instructions for cooking a pork loin in the Instant Pot.
Yes, so long as the loin fits in your air fryer. Here are the instructions for cooking a pork loin in the air fryer.
According to the National Pork Board, it is now safe to eat pork once it has reached 145°F. However, many people grew up in the days where pork needed to be cooked to 160°F. When they see slightly pink pork meat, which is what you get at 145°F, it bothers them. If you are bothered by the slight pinkness, cook yours to 160°F. If that doesn’t bother you and you want juicier pork, then cook it to 145°F.
The celery is just acting as a rack to keep the meat lifted so that the air circulates under the roast, which leads to more even cooking. You can use carrots instead. Or you can use an oven-safe metal rack.
Once the pork is finished cooking, carve it and serve. If you aren’t eating the roast immediately, don’t carve it. Refrigerate it whole and then slice it once it is cold. You can get thinner slices that way because all the juices have been re-absorbed and the cold temperature makes the roast firmer. If you have sliced pork, put it in an airtight container, or on a plate covered with plastic wrap, and store in the refrigerator for up to 4 days. In a freezer bag, it will keep in the freezer for 2 months.
It’s easiest to reheat it in the microwave. Put pork slices on a plate. Add a few drops of water or stock. Cover loosely with plastic wrap or another microwave-safe cover. Microwave 40 seconds at a time until heated through. Alternatively, you can reheat a pan of slices in the oven. Put the slices in a slightly overlapping layer on a large pan. Drizzle with a bit of water or stock (1-2 drops per 4 slices). Cover with foil. Heat at 300°F for 20 minutes, or until heated through.
Sometimes when roasting a pork loin, you don’t get a lot of drippings (juices that drip out of the roast as it cooks). Instead, what sometimes happens is you get just a little bit of drippings and those drippings hit the hot roasting pan and then they can burn onto there. If you were later going to deglaze that pan to make gravy, there would be a bitter burned flavor from the drippings. A little bit of broth or stock in the pan gives the drippings somewhere safe to fall. They’ll drip into the broth/stock and then won’t burn. The flavor that broth gives makes it better as juices for gravy later. Also, as the broth evaporates, it leaves some brownings on the sides of the roasting pan. Make sure you either scrape those into your gravy juices, or pour more broth in to dissolve that flavor. So, if you’re making gravy, then put some broth or stock in the bottom of your roasting pan. Half an inch will do. If you’re not making gravy, then the broth isn’t necessary.
I think this is because pork loin roasts are cylindrical. They’re essentially the same thickness no matter how much they weigh. The differences in weight come from how long the roast is. An 8-pound pork loin roast will be the same circumference as a 4-pound roast but it will be twice as long. Cooking times for roasts are calculated to figure out how long it takes the heat to penetrate from the outside to the inside. Thus, it’s not going to take that much longer for the heat to get to the middle of the 8-pounder than the 4-pounder since they have the same distance from the side edges to the middle.
Treat the two roasts as though they are separate things in the oven, even if they’re on the same pan. That is, calculate the cooking time for each one separately, and then do not add those times together. So, if one roast is 3 pounds, it will cook for 60-75 minutes. If the other is 4 pounds, it will cook for 80-95 minutes. Do not add those times together. Instead, what you’ve learned is that the roasts are going to be in the oven together for 60-95 minutes. You’ll check the smaller roast at around 60 minutes, and check on the larger one at around 80 minutes. When one reaches the desired temperature, take it out and let it start resting. It’s fine if one rests for longer than the other. Then they can both go back in at the same time for the high heat final sear.
When you cover a roast with foil or a lid, you are essentially wet-roasting it. That’s like braising. The meat steams. That’s great for some cuts of meat, especially pot roasts. However, if you want a nice browned and crunchy crust on your roast, you can’t cover it. It shouldn’t burn though. If you notice any over-browning, you can cover it with foil. Just make sure that you do not then cover it for the final blast in high heat. For the above recipe, the roast is NEVER covered when it is in the oven. It is only covered during the resting time in between its two visits to the oven.
There are so many side dishes that you can serve with pork. If you’re making the gravy, I highly suggest mashed potatoes, but Parmesan Roasted Potatoes are excellent as well. Add some color with green beans, Brussels sprouts, or a fresh salad.
Yes, it is totally safe to cook a pork loin straight from frozen. The only issue is that the timing isn’t going to be as straightforward.
It typically takes 1.5 times as long to cook meat from frozen as it takes from fresh, so it will be 30-37 minutes per pound instead of 20-25. Having said that though, the actual temperature of your freezer and the size and shape of the roast are factors that can affect the time.
My advice is to do the following. Cook it for about 28 minutes per pound and then start testing it with an instant read thermometer. After that, test it every 15 minute (15 minute intervals, not minutes per pound) until it reaches the desired temperature. The roast needs to get to at least 145°F (poked in a few places) to be safe. But see the section above about pork temperature in case you like yours more well done.
An additional thing to note is about seasoning. It’s difficult to get seasoning to stick to a frozen roast. It’s best to let it cook for a little while so that the outside has thawed a bit and then add the seasoning and continue roasting it.
I hope that answers all of your questions about roasting pork loin. If not, please leave a question below. And, if you make and love this recipe, leave a comment telling me and all the visitors to the site, and be sure to give it a five star rating too! Have a great day!
Podcast Episode: Roasting Pork Loin
Listen to me explain briefly about how to make the roast pork, with some great tips along the way, by clicking the play button below:
Listen to more Recipe of the Day episodes here.
Print
Oven-Roasted Pork Loin Recipe
- Prep Time: 5 minutes
- Cook Time: 1 hour 20 minutes
- Total Time: 1 hour 25 minutes
- Yield: 4 servings 1x
- Category: Entree
- Method: Roasting
- Cuisine: American
DESCRIPTION
A delicious method for roasting pork loin that is juicy in the middle and brown and crusty on the outside.
Ingredients
- 1/2 tsp. black pepper
- 1/2 tsp. garlic powder
- 1/4 tsp. salt
- 3–5lb. pork loin roast
- 3 ribs celery (optional)
Instructions
- Preheat oven to 350°F.
- Mix together black pepper, garlic powder and salt. Rub it all over pork.
- Put the roast on a rack in a roasting pan. If you don’t have a rack use 3 stalks of celery lying side by side.
- Roast until internal temperature is between 135-150°F, 18-25 minutes per pound.* If you prefer your pork slightly pink, go with the 135F at this stage. If you prefer it fully white and well done, then go with the 150°F temperature.
- Cover roasting pan with foil and let rest for 30 minutes.
- Heat oven to 475°F. Uncover roast and remove the thermometer. Put roast into a clean pan and roast for another 10 minutes. Test with the thermometer to make sure the roast is at least 145F, or is the higher temperature that your prefer.
- Carve and serve immediately.
Love this recipe? I’d appreciate it if you could scroll down and add a *5 star rating* to help others know they’ll love it as well!
Notes
*Note: This recipe used to cook the roast to 145-160F in this step. However, further testing has found that the temperature will rise by 10 degrees during the resting phase and final cooking phase. I therefore now recommend that you take the pork out of the oven at this lower temperature of 135-150F. If you’d like your finished pork roast to be slightly pink, take it out at 135F, and it will reach 145F by the end of the recipe. If you like it fully white and cooked through (well-done) take it out at 150F and it will reach 160F by the end.
Note also that on one occasion recently it took 30 minutes per pound for my roast to reach an acceptable temperature. My best advice is to wait to finish off your side dishes until your roast has reached the desired temperature and you have taken it out of the oven to rest. That way everything will be ready at the same time.
This post was published in September 2017 and was updated in November 2022.







What an amazing easy recipe and so delicious also. I had a 4lb roast and I am cutting it into thicker cuts and freezing each for later use. Thaw and pan sear. Good to go. All very easy. I only cooked to 145 for this reason.
Thanks for sharing, Dee!
Hi Christine,
I prepared your juicy pork loin recipe and it was absolutely excellent!!! The BEST I’ve ever made in my 51 years of cooking. My husband and I were so delighted with how it turned out. Thank you so much for sharing your perfected recipe! This is the only way I will roast a pork loin from now on 😋
Do you have recipe for a bone in beef rib roast? I have an 8.14 lb 4 bone roast I’d like to roast for Easter for my family. I would greatly appreciate any tips or a recipe you have to share. Thank you again!
Michelle
Thank you so much, Michelle! I’m thrilled you loved this recipe.
Your commentary and explanations for this simple recipe not only made a great meal but made me a better cook since I understood the “why” behind the cooking. I have made pork loin roasts for years but this was the best. It worked well for my small 2 lb roast as well.
Deborah, I’m really happy that you liked the recipe and explanation. Thank you in return for the lovely compliments to my cooking and writing. You’ve made my day!
Excellent recipe Great instructions
Thank you, Janet! All the best in 2024!
I make this pork lion recipe all the time. love it it perfect every time. Thank you for sharing
You’re welcome, Joanie! I love this one too.
I made dinner tonight using this recipe for the 3.0 pound pork that I
had. It was delicious! I don’t have a rack, so I used the recommended
3 stalks of celery lying side by side. It worked like a charm! My husband
loves pork, so I am definitely saving this recipe for the future! Thank
you for the tips, Christine!
Appreciatively,
Tanya
You’re welcome, Tanya! I’m so glad you loved it and will use the recipe again.
Love the detail. I can tell you have thoroughly researched. Especially when you recommended a shorter cooking time for a larger roast. Great tip!!
Thank you for taking the time to leave a comment, and for noticing the detail. My goal on this site is to develop the best possible recipes that are still convenient for a home cook to make. It’s so great to know that the testing is paying off and that the recipes are being enjoyed by others like you!
Great method. I will be using this from now on for pork loin roast.
I added 2TBS. herbs de provence, 2 TBS. olive oil and 4 cloves of garlic. First salted and peppered the roast and then added the above and marinated over night. Came out great.
Thanks so much for sharing, Amy! So glad you enjoyed.
Donna’s comment made me laugh! My Mom was born in the 20s and simply EVERYTHING had to be “thoroughly” cooked, as in a 2nd death. This included not just pork, but canned vegetables!! My Mom would insist that all canned veggies had to be boiled for 20 MINUTES. (I realize this had something to do with the old tin cans but sheesh!) Pork was another unfortunate casualty of my Mom’s out dated beliefs. I am 58 now but it wasn’t till my mid 30s that, and time for the internet, that I was retrained!!
My roast is in the oven now, it smells divine!! I opted for Tarragon, fresh garlic, a little thyme and a little Sierra Ale Dijon mixed into butter, on the roast and stuffed into a few covert little slits here and there.
Thank you for the re-education, so I can enjoy a pork roast at home and not just at a restaurant!!
Thank you for sharing, Samantha. :) Your roast sounds fantastic, I hope you loved it!
Love the pics, explanations, questions and answers and tips like using celery or carrots as a rack. Also appreciate the highlighting of dif cuts, ect that would lead to dif recipes. Thank you. I have 2 in the oven now. And since I am from the 50’s, your right, I will heat to 150.
I’m so glad you found all the information helpful, Donna. Enjoy!
Hi. My Mom would sear the roast in a cast iron pan with the seasonings then put in the oven @ 325 degrees til at 145 degrees. Removed and covered for 10 minutes. Is this old recipe still doable?
Debbie, what you are describing is the way that I also learned from my mom and from my grandmothers for how to cook roasts. You can see a version of that kind of recipe here https://cookthestory.com/apple-mustard-glazed-pork-loin/ It is absolutely do-able and if you like it, keep doing it.
However, in more recent years I have learned that following the above method works better for me and for many of my readers. Why? There are a couple of reasons. First, you’re cooking the roast more slowly at first (no part of it is hitting sudden high heat). This keeps the fibers more relaxed and thus more tender. Second, you get a better crispy and flavorful crust on the meat. With the older method, you create the crust first but then it slowly steams and softens in the oven, or while the roast rests. With this method, the crust is done at the very end so it doesn’t have time to soften in the oven. And, since you rest the roast BEFORE creating the crust, and then you don’t rest the roast again, you are slicing the roast while it is at its crispiest.
Hi! I am on vacation in a condo with a not-so-great stocked kitchen. No meat thermometer for starters. Nice place, but only the BAREST OF BASICS. :) Could you suggest cooking times? I have a pork loin roast that is 1.81 lbs. Thanks so much! Karena
Hi Karena, I feel your pain. I’ve been in this situation before. I’m wondering though if you have a pork tenderloin rather than a pork loin roast. Pork loin roasts aren’t typically that small. Anyhow, you’ll be cooking it for 35 minutes to an hour. Just cut into it and check periodically to be safe, make sure that it isn’t pink inside and that the juices are running clear. Honestly, that might mean that it’s a bit drier than you’d usually want it to be, but you will know that it is fully-cooked.
This is a great recipe for a juicy pork loin. I followed the recipe to the letter, and the pork loin turned out wonderfully. The flavors were well-balanced, and the pork was cooked perfectly. This dish would be great for a dinner party or a casual family meal.
Thank you so much!
I have not made this yet but I will be this afternoon. I have used reverse searing techniques with beef before and have really liked the results.
The only thing I have a question about is the minuscule amount of seasoning. What gives? I’m sure it must be a misprint. The temps and timing are spot on and are very easy to follow.
That being said I’m using my own mix of seasoning and giving juicy flavor.
Yes, this is a fairly simple recipe for people to perfect the basics of a perfect pork loin. I absolutely encourage you to season away to your hearts delight, Michael! I’d love to hear what you ended up using. You could also check out my Rosemary Garlic Pork Loin for more ideas.
Turned out perfectly!
So happy to hear that, SP!
145 is the final serving temp I am looking for. If you take out the loin at 145, won’t it be overcooked after resting and after searing? Would it be OK to take out at 135?
Tobin, I agree with you and actually retested and changed the recipe right around when you asked the question. The issue is that I want everyone to be safe and to make sure that their pork is cooked to at least 145F, and so I had that as the temperature to take it out at.
But, as long as people are careful to test the final temperature of their roast to make sure that it is at least 145F after resting and doing the final blast of heat, then taking it out at 135F will be safe. I will again caution you (and others) about this though: Many of us are used to pork that is fully white once cooked. If that is you, you will want to have your final temperature be closer to 160F. If you like your pork a bit pink, then the final 145F will work for you.