Learn how to grill chicken perfectly by pre-cooking in the oven (low and slow) before hitting the grill. That way, you know it’s fully cooked and juicy so you can relax and enjoy your guests without worrying about feeding them under-cooked or dry chicken.
Recently I found a way to make grilled chicken foolproof. What do I mean? I mean, it’s a way of grilling chicken where you know for sure that the meat is cooked through, and you know for sure that it is tender and juicy, definitely not dry.
This method is great for if you’re having friends over because you can do most of it ahead of time. You can also make a big batch so if you’ve got a lot of friends, this recipe’s for you!
Scroll down to read more about how it all comes together or click here to jump straight down to the recipe.
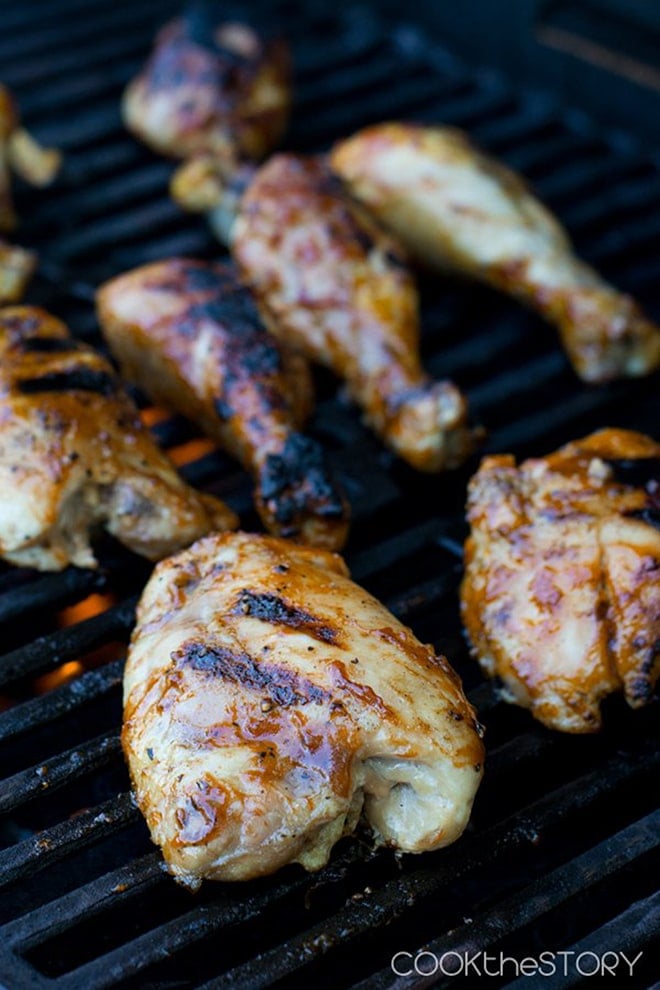
The Key To Perfectly Grilled Chicken:
The key to grilled chicken is to precook it in the oven ahead of time so you know it’s fully cooked and ready for the grill. Cooking it ahead of time also lets you cook it slowly, which yields nice, juicy, and tender meat. Plus, it gives you time to put your feet up during grilling season because most of the work is done beforehand.
Video: How To Grill Chicken Perfectly
What Kind Of Chicken Should I Use?
For this recipe, we’re using bone-in chicken thighs and drumsticks. I prefer skinless but skin-on works too. I find that the skin doesn’t get really crispy on the grill no matter what I do. However, skinless can be either hard to find or more expensive.
Chicken breasts are not ideal for this method. If you really want to though, bone in and skin on chicken breasts are best. If you are planning on grilling boneless skinless chicken breasts, I have a separate post about that. They require a different method.
Want to grill a whole chicken? Get the instructions here.
Finally, if it’s wings you’re craving, you can learn how to grill chicken wings here.
How To Grill Chicken, Step-By-Step
Step #1
With a big group coming over, buy bulk packs of bone-in chicken thighs and drumsticks. Get it with the skin on, cook it in the oven, then see the tip in Step #2.
Up to two days before the party, season the chicken with a spice rub (see printable recipe at the bottom) and bake at 300°F for about an hour.
Tip: After an hour of baking, test with an instant-read thermometer. The chicken should be at least at 165°F internally. If it’s over that, it’s ok. It’ll still be juicy!
Step #2
Then you remove the chicken from the oven and let it cool down a bit on the counter.
NEW TIP! – I just discovered this and had to edit this recipe to tell you about it! After the chicken has cooled a bit, but before adding sauce, simply pull the skins off if you don’t want them on. As I explained in step #1, I prefer skinless, but this is a great hack for when you can’t find them or there’s a sale on skin on!
Extra Tip – Use a pair of clean kitchen scissors (called kitchen shears) to snip away any skin that is attached to the bone.
Extra Extra Tip: These kitchen shears come apart for better washing, which is especially good for when we use them on chicken to make sure they’re sanitized.
This method of removing the skin after cooking is WAY easier than skinning the chicken before cooking and the skin also helps retain some moisture and adds flavor to the chicken meat while cooking. Win-win!
Step #3
Brush the chicken with your favorite BBQ sauce. I love this homemade basic barbecue sauce. It only has three essential ingredients but there are instructions for doctoring it up in different ways so you can customize it with additional spices like garlic powder and paprika.
Step #4
Refrigerate chicken until dinner time.
Step #5
Use tongs to transfer the chicken pieces to a grill at medium heat that is prepped for direct heat cooking. Cook, turning occasionally (I use nice, long tongs like these so that my hands don’t get too close to the heat), until there are grill marks on all sides and the meat is heated through, about 8 to 10 minutes total. You can baste them with sauce halfway through if you’d like but note that this can dislodge or hide the grill marks. I don’t usually baste midway through for this reason.
Note that you can instead broil the chicken. Put the sauced chicken on a pan that is safe under your broiler. Pre-heat the broiler. Put the chicken on the pan under the broiler, about 6 inches form the heat. Broil until dark spots are appearing, then flip the chicken and broil the other side until dark spots are appearing. Taste some chicken to make sure it’s heated through. It should take about 8-12 minutes total (4-6 minutes per side).
Step #6
Serve with lots of napkins and your favorite side dishes like hearty baked beans and potato salad.
Podcast Episode: Grilling Chicken
Listen to me explain briefly about how to make this chicken, with some great tips along the way, by clicking the play button below:
Listen to more Recipe of the Day episodes here.
Print
How To Grill Chicken Perfectly Recipe
- Prep Time: 10 minutes
- Cook Time: 70 minutes
- Total Time: 1 hour 20 minutes
- Yield: 8 servings 1x
- Category: Entrée
- Method: Grilled
- Cuisine: American
DESCRIPTION
This grilled chicken is pre-cooked in the oven (low and slow) before hitting the grill. That way, you know it’s fully cooked and juicy so you can relax and enjoy your guests without worrying about feeding them under-cooked or dry chicken.
Ingredients
- 2 tsp. salt
- 1 tsp. pepper
- 1 tsp. garlic powder
- 2 Tbsp. brown sugar
- 6 lbs. skinless bone-in dark meat chicken (drumsticks and/or thighs)
- BBQ sauce
Instructions
- Preheat oven to 300°F.
- In bowl combine salt, pepper, garlic powder, and brown sugar. Rub on chicken and then arrange in a single layer on a large rimmed baking sheet. Bake for 1 hour. Double-check that the chicken is cooked by cutting into the thickest part and making sure it’s not pink inside or using a meat thermometer to check that it’s reached 165°F.
- Let cool for 15 minutes. If your chicken is skin on, carefully remove the skin before grilling. For skin that is attached to the bone, cut it off with kitchen shears.
- Brush each piece with about 2 tablespoons of sauce. Cover and refrigerate up to 36 hours.
- 15 minutes before eating, prepare grill for direct cooking over medium-high heat.*
- Add chicken pieces and cook until grill marks appear on underside, 4-5 minutes. Flip and cook until heated through, another 4-5 minutes. Baste with more sauce halfway through if desired but this isn’t necessary and doing so can hide your beautiful grill marks.
Love this recipe? I’d appreciate it if you could scroll down and add a *5 star rating* to help others know they’ll love it as well!
Notes
*Note: You can instead broil the chicken. Put the sauced chicken on a pan that is safe under your broiler. Pre-heat the broiler. Put the chicken on the pan under the broiler, about 6 inches form the heat. Broil until dark spots are appearing, then flip the chicken and broil the other side until dark spots are appearing. Taste some chicken to make sure it’s heated through. It should take about 8-12 minutes total (4-6 minutes per side).
This recipe was originally published in July 2014. It was revised and republished in May 2023.





Hi! Do I need to cover it with foil when baking for an hour? Thank u
You do not need to cover while baking, Coy. Enjoy!
I needed a recipe to make my camping a bit easier and came across this one. I cooked the chicken and froze them for several days until we needed them at the campground. I let them thaw overnight in the fridge and we BBQ/grilled them for supper. I made several pounds and had very few left overs with the family raving about the taste and how tender and moist the chicken was. The next morning, the left overs became an impromptu breakfast. This is a keeper! Thank you
That is wonderful to hear, Chris, thank you for sharing!
Since you loved it, I’d really appreciate you adding a 5 star rating if you have a moment, which helps others find this recipe too. Thanks!
My guests insisted on taking extra servings home! The tender chicken with BBQ was delicious.
Haha, that’s fantastic to hear, NB! I’m so glad everyone enjoyed it so much.