This is the best rib recipe, especially when you’re feeding a crowd! The ribs are slow-cooked in the oven (hack!). Then just before serving, they’re sauced and grilled to heat through and get a bit of that gorgeous grill flavor.
Ribs are good. Make-ahead ribs are even better.
I love making them when we’re having friends over. The amazing thing about them is that you have to make them ahead. Ribs need to be cooked long and slow. So you get them ready well before your friends come over. Earlier in the day, or the day before, or even the day before that.
Actually, you can even pre-cook them following this recipe, sauce them, and then put them in the freezer for up to 3 months! Then you defrost them and follow the grilling instructions.
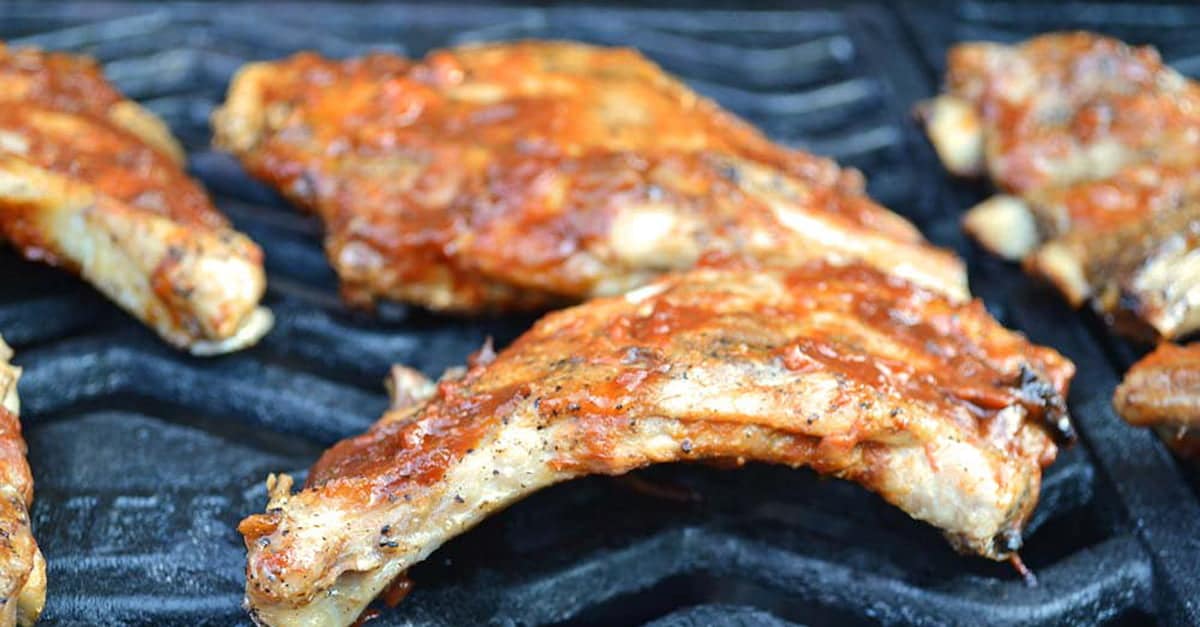
Video: Ribs Being Finished Multiple Ways
How To Cook Ribs
You’ll want to start by removing the membrane found on the bone-showing side of the ribs, if it’s there. Sometimes it’s removed already. I don’t always bother with this step. However, if you really want the flavors to penetrate the meat, and if you want the ribs to be extra-tender, you really should do it.
Here’s a video from barbecueweb.com showing how to remove the membrane from the bone side of ribs.
After that, I cook the ribs low and slow. They’re seasoned with a rub and then wrapped in foil. Put them on to a pan and cook them for 2-3 hours, depending on the type of ribs and on how tender you like them. Note that you can alternatively season the raw ribs with the rub, wrap them in foil, and then refrigerate them for 2-24 hours to really let the flavors of the rub penetrate. But I find that this isn’t really necessary.
Once the ribs have finished cooking in the oven, let them cool on the counter until you can more easily handle them. Then cut them into individual rib portions, and sauce them up.
How To Finish The Ribs On The Grill
You can grill them right away after cutting them, or that’s when you pop them into the fridge. If you choose to refrigerate them, take them out about 15 minutes before you want to start grilling.
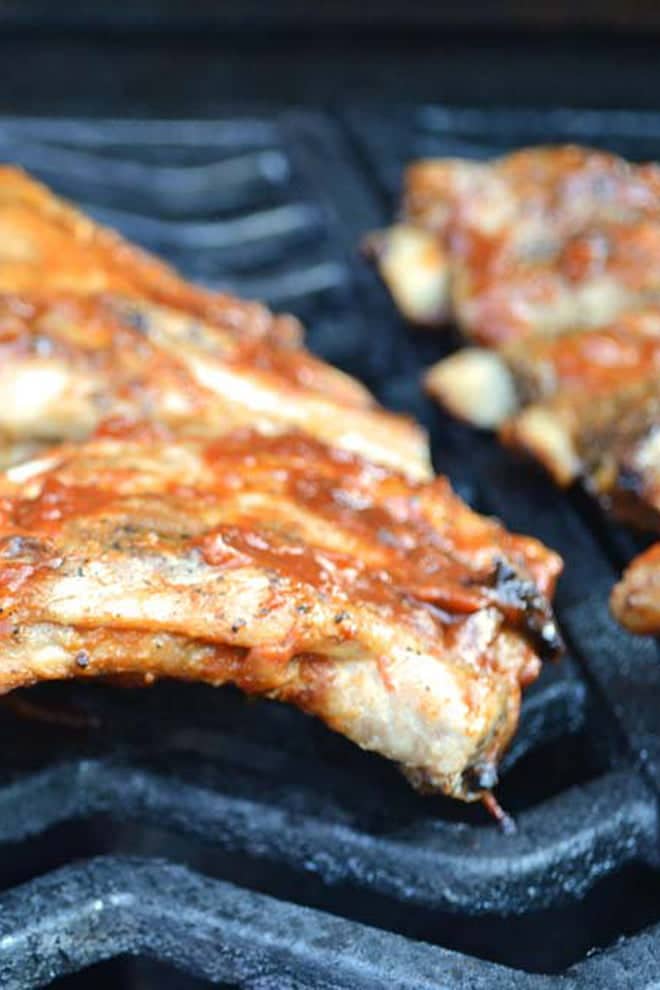
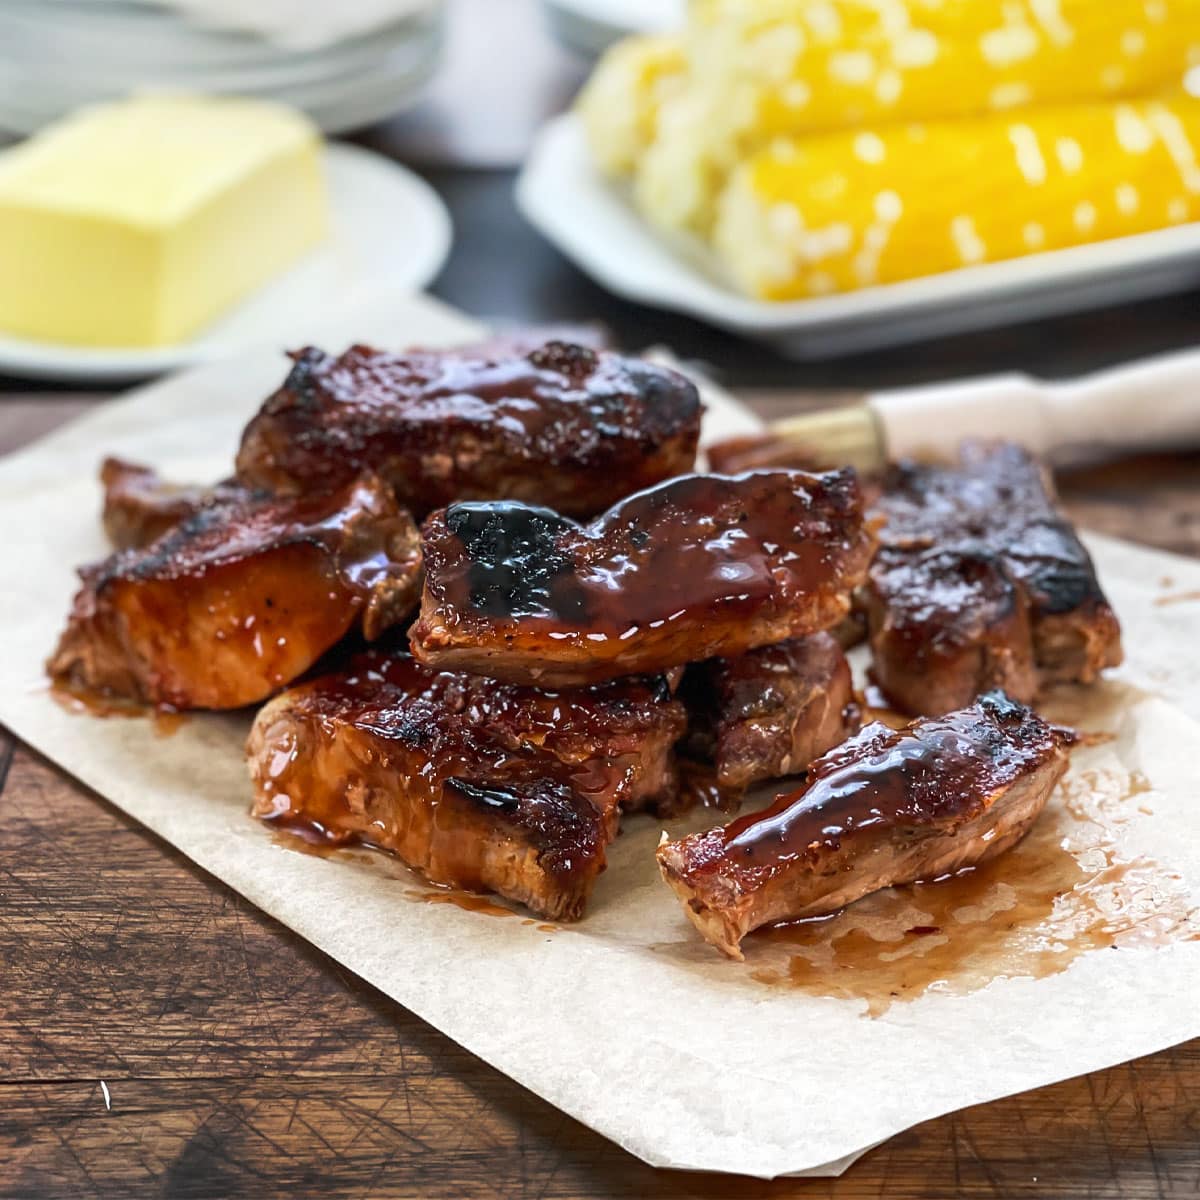
You’re going to grill the ribs over direct heat for just a couple of minutes per side. What you’re doing here is simply heating them through and getting a little bit of that nice char on them. So quick and easy at this point, right?
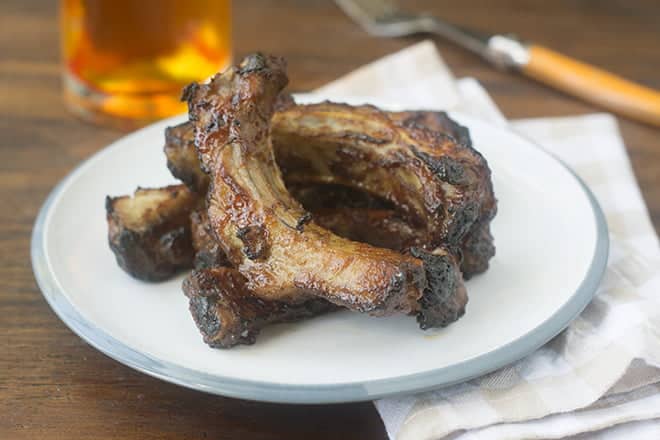
The best thing about this method for cooking ribs is that you’re not having to worry about raw meat at your party, “Did I cross-contaminate? Is it still under cooked?? Did I overcook it???” None of that to worry about. Just stand there warming them up, flipping them occasionally. When there’s a bit of char on the outside, they’re done. Eat!
Ribs are all about the texture, which is pretty subjective. I like mine with meat hugging the bone just enough to not fall off when getting a toasty sauce-crust on the grill. If you like them to be actually falling off the bone, keep them in the oven for longer.
What Rub Or Sauce Is Best For Ribs?
Once you get the texture down you can play around with the flavors to your heart’s content. For this recipe, I used my own rub and my own sauce. Here is my favorite classic BBQ sauce recipe, and my smoky and spicy recipe. You can also try my Sweet and Smoky Dry Rub for Ribs which is a little different from the one in the recipe below.
If you’re feeling lazier, skip the homemade rub and skip the homemade sauce too! Just use salt, pepper, and garlic powder to start, and then go in with a bottle of your favorite store-bought. The ribs are so good that nobody is going to notice.
If you like the idea of these ribs, you’ll also love this recipe for Make-Ahead Grilled Chicken for a Crowd. It’s the same basic technique but with chicken. And the result is beyond juicy
More Delicious Ribs Recipes
- Best Oven-Baked Ribs
- Grilled Beef Ribs
- Flanken-Style Ribs Recipe
- St. Louis Ribs
- Air Fryer Ribs Recipe
- Instant Pot Ribs
- Country-Style Pork Ribs
Podcast Episode On Cooking Ribs
Listen to me explain briefly about how to make these ribs, with some great tips along the way, by clicking the play button below:
Listen to more Recipe of the Day episodes here.
Print
How to Cook Ribs Perfectly Recipe
- Prep Time: 15 minutes
- Cook Time: 2 hours 10 minutes
- Total Time: 2 hours 25 minutes
- Yield: 6 servings 1x
- Category: Entree
- Method: Grilling
- Cuisine: American
DESCRIPTION
This is the best rib recipe, especially when you’re feeding a crowd! The ribs are slow-cooked in the oven (hack!). Then just before serving, they’re sauced and grilled to heat through and get a bit of that gorgeous grill flavor.
Ingredients
- 1 Tbsp. brown sugar
- 2 tsp. kosher salt
- 1 and 1/2 tsp. smoked paprika
- 1 tsp. garlic powder
- 1 tsp. mustard powder
- 1 tsp. ground cumin
- 1/2 tsp. crushed red pepper flakes (optional)
- 2–3 lb. racks of baby back ribs or St. Louis Style spare ribs
- About 9 oz. bottled BBQ sauce. Look for a sweet one that has the word honey or brown sugar in the name – Here is my favorite classic recipe, and my smokey and spicy recipe
Instructions
- Preheat oven to 300°F.
- In a small bowl combine the brown sugar, salt, smoked paprika, garlic powder, mustard powder, cumin, and crushed red pepper flakes, if using.
- Optional Step: Remove the membrane from the bone side of the ribs. If you don’t know how to do this, check out the video link in the article above.
- Lay each rack of ribs on a large piece of aluminum foil. Sprinkled each side of each rack with ¼ of the rub mixture. Wrap each rack tightly in the foil making sure the scrunched up folded seam is along the top of the racks. Lay each foil wrapped rack seam side up on another large piece of foil and wrap tightly with the seam along the top again.
- Put the ribs onto a large pan with a lip to catch any juices that escape. Put the pan into the preheated oven.
- Cook baby backs for 1.5-2 hours, St. Louis spare ribs for 2-2.5 hours. The shorter cooking time will fully cook the ribs and get them tender but still hugging the bone. The longer cooking time will yield ribs that fall off the bone.
- Remove pan from oven and allow ribs to cool for 15 minutes (this sets the juices making it easier to cut the ribs and helping the meat stay on the bone when you grill). Proceed or transfer ribs to the fridge overnight.
- Carefully unwrap the ribs. Transfer the racks to a cutting board.
- Preheat your grill for direct grilling over medium-high heat.*
- Cut the ribs into servings with 1-2 bones each. Brush each serving liberally with sauce. Put the ribs on the grill for 5-7 minutes turning occasionally. All you’re doing is heating them up and getting a bit of char here and there. Taste one to see if it’s heated through ;)
Love this recipe? I’d appreciate it if you could scroll down and add a *5 star rating* to help others know they’ll love it as well!
Notes
*Note: Instead of grilling, you can finish these ribs under the broiler. Put the sauced rib portions on a broiler pan set about 6 inches below the broiler. Broil until ribs start to get dark spots in places, then flip. They’re finished when they’re heated through and darkened in places on both sides. It’ll take about 6-10 minutes total.
This post was published in July 2012 and was updated in July 2021.



I have used your recipe before and loved it. I just made 20 lbs of ribs for my husbands birthday party and did not want to spend the evening at the grill. I grilled them at 4p and then placed some of the drippings in the bottom of a pan and then a wire rack so the ribs would not be sitting in the liquid. Placed the grilled and lightly sauced ribs on the rack, covered tightly with foil and put them in a 250 degree oven. I served them around 7-730p and they were perfect!! Moist and tender…a big hit! Thank you!
Sue, So happy you liked them. Yay! Thanks for letting us know.
I was not able to find what to do with the cooking liquid that is poured after cooking and before refrigerating the ribs.
thank you
I attempted this and the chicken to prepare for our 4th of July party….
The chicken turned out perfect…but my ribs are super tough…even hard to cut through…I pulled the membranes, did the rub, put in fridge over night, and slow cooked for 2 hours at 300 degrees….
Any ideas what went wrong??
Natascha, I have no idea what went wrong. I do this method for ribs all the time and they are very very tender. The 2 hour slow cooking time should make them tender for sure. I can’t think what could have happened.
Hi, do you think I could do the reheating portion of this in the oven as well, under the broiler? We don’t have a grill so I usually bake the ribs in foil packets low and slow, then unwrap and finish them with the convection one under the broiler. Do you think it would work with a day or two between?
Rose, I think it would work. My only concern is that if the ribs are too close to the heat source they will blacken before they are heated through. So either keep them far from the burners or warm them in the oven or microwave first before broiling them. Great idea!
Have you tried freezing the ribs after you bake them then hauling them out a couple of months later to finish them on the grill?
MaryAnne, I haven’t frozen them for a couple of months but definitely for a couple of weeks. I baked them and then sauced them and cooled them. Then I put them in a freezer bag and frozen them. I defrosted them in the fridge overnight and then heated and charred them on the grill before serving.
When making ribs or chicken ahead of time, do you want to take them out of the over a little underdone so they don’t over cook when you reheat?
Diana, actually, with both my ribs and my make ahead chicken recipe, the meat is slow-cooked and cooked past the minimum recommended temperature. The ribs are cooked for a good couple of hours. The chicken drumsticks for an hour. They are both very juicy at that point. Then they spend such a short time on the grill that it doesn’t make them overcooked. In fact, you’re really just heating them through. They’ll be really juicy and perfect. Great question!
These look and sound amazing. I can’t wait to give these a try!!!
I love that! Ribs are good. That is all… that might need to be my new motto for cookies!
For me, ribs beat cookies every time. But then I don’t have that much of a sweet tooth, more of a protein tooth. I could totally say, “Cheese is good. That is all.” Now, if the cookies had bacon in them…
You are making these for our next BlogCon meetup, yes??? Kidding :) Although I will reimburse you for the meat if you make this happen!
Great idea!!! Ribs are a super-easy thing to make for a group. No need to reimburse. Just bring some wine ;).
OMG! I love ribs! Great link on removing the membrane. Fun to see your method. We’ve boiled them in the past as our first step but I must confess we don’t make them very often. I’m looking forward to your recipe and baking in lieu of the boil.
Ahhh…we often boil them in the winter. We then braise them in BBQ sauce to finish them off. But if they’re heading for the grill, then we bake them. I think baking them retains more flavor (less ends up left in the water) though and so I think this winter I’m going to bake then braise instead of boil then braise. Worth trying anyhow!
“Ribs are good. That’s all.”
I’m dying over here. Also, you finally clued me into what to do with the leftover rib drippings…after two years of wondering (I’m a recent rib convert).
:). As much as I love ribs, I sometimes make them just because the next day I get leftover’s soup with the drippings in it. Seriously, “soup” IS the answer to everything (or at least everything that doesn’t already have “bacon” as the answer).