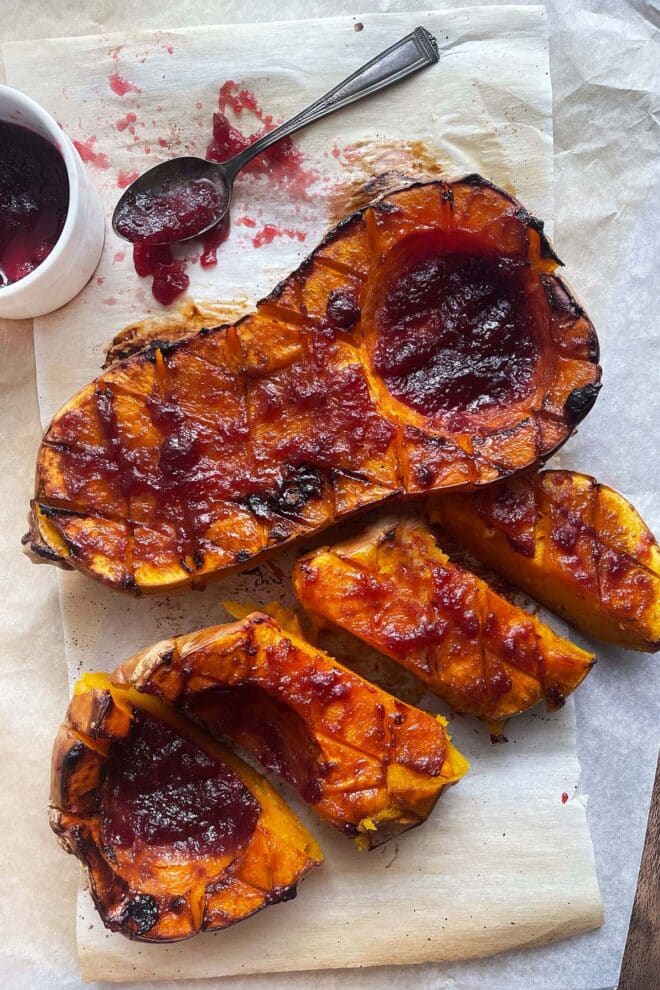
This Roasted Butternut Squash with Cranberry Glaze turns leftover cranberry sauce into a no-fuss, sweet and tangy side dish.
Roasted butternut, on its own, is one of my favorite vegetables – it’s naturally sweet, and is delicious warm or cold, in soups or as a side, or even in a salad. Glazing it though, adds another layer of flavor that gets caramelized during roasting. And glazing it with leftover cranberry sauce is a win-win every way you look at it.
The cranberry adds a sweet and tangy topping that develops a deeper flavor as it roasts, and I get to use up all of my extra cranberry sauce that would otherwise just sit in the fridge, unused.
How To Cut A Butternut Squash
If you love butternut squash, but don’t love cutting butternut squash, you’re my people.
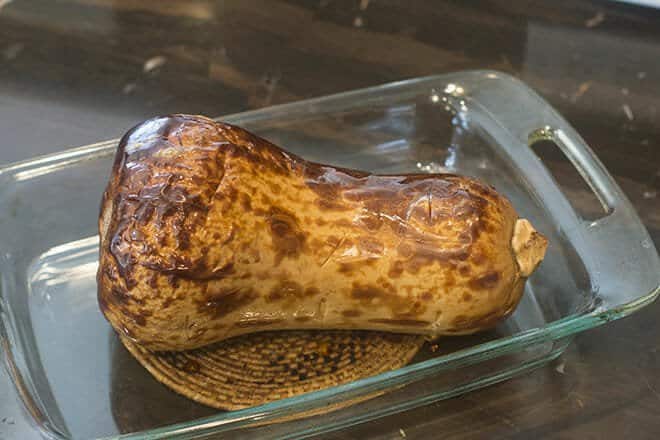
I think I’ve tried every method, including microwaving it first to make it softer, cooking it whole, cutting into slices. They’ve all worked, but it’s just not the same as cutting the raw butternut in half, removing the seeds, and revealing all of that gorgeous, orange real estate, prime for roasting in a hot oven.
My latest adventure in cutting a butternut in half, however, is easy, safe, and works so well that I’ve scrapped any method I’ve previously tried. This one is now my go-to. You’ll need a sturdy cutting board, a clean kitchen towel, and a sharp chef’s knife.
Step-by-step Cutting Instructions:
- Grab your biggest wood or plastic cutting board, which should be bigger than the butternut that you’re about to cut. Do not use glass (ever), as it promotes slipping and can damage your knife blade.
- Secure your cutting board. Do not skip this step! You cannot safely cut a round object, like a butternut squash, on a cutting board that’s sliding around the counter. If you have a non-slip mat, like a padded shelf liner, place that on the counter, under your cutting board. Otherwise, wet four or five paper towels, or a small kitchen towel. Wring out the excess water, lay flat on the counter, and place your cutting board on top. It’s like glue, it won’t move.
- Grab your clean kitchen towel and bunch it up on top of the cutting board. Place the squash on top of the towel, making sure it can’t roll off. Rotate the squash so it is diagonal on the cutting board, with the skinny end of the squash pointing toward you and the wider end facing away from you.
- While gripping the wider end of the squash with one hand, insert the tip of a sharp chef’s knife into the center of the butternut, with the handle of the knife pointing toward you. Push the tip of the knife into the squash as far as it will go without forcing it, and then push the handle of the knife straight down toward the towel.
- Turn the squash 180 degrees and repeat with the wider end of the squash, inserting the tip of the knife in the same middle spot.
- You can now safely run the knife through the entire squash to complete the cut if it has not already cut clean through.
Okay, now that the hard part is over, let’s get this beautiful thing roasted!
What Kind Of Cranberry Sauce Can I Use?
The recipe calls for jellied cranberry, but honestly any style of cranberry sauce will do, even Homemade Cranberry Sauce. The most important part is to combine it with orange juice to make it a little saucy and spreadable so it clings to the butternut as it’s roasting.
Customize Your Cranberry Glaze
There are so many yummy variations you can make with this cranberry glaze. Try stirring in a teaspoon of grainy mustard; or if you like things super sweet, increase the sugar by a tablespoon. Add the zest of an orange and grated ginger, or try studding the butternut with whole cloves for all of the holiday feels.
Let Your Roasted Butternut Squash Rest
As tempting as it will be to dig right into the butternut after it comes out of the oven, let it rest a bit before cutting. This will give the steam inside the squash a chance to settle down and make it easier to cut. It’ll be worth the wait!
More Butternut Squash Recipes
If you’re as obsessed with butternut squash as I am, you’re going to love the recipes I’ve linked to below. And also, be sure to check out my whole collection of over 100 delicious side dish recipes over here.
- Easy Mashed Butternut Squash
- Butternut Squash Casserole
- Roasted Butternut Squash With Cranberry Glaze
- Butternut Squash Roasted Whole
- Microwaved Butternut Squash
- Instant Pot Butternut Squash
- Butternut Squash Soup

Roasted Butternut Squash with Cranberry Glaze
- Prep Time: 10 minutes
- Rest Time: 10 minutes
- Cook Time: 1 hour
- Total Time: 1 hour 20 minutes
- Yield: 4 servings 1x
- Category: Side Dish
- Method: Baked
- Cuisine: American
DESCRIPTION
Leftover cranberry sauce turns oven-roasted butternut squash into a no-fuss, sweet and tangy side dish.
Ingredients
- 1 medium butternut squash, sliced in half, seeded
- 1/4 cup jellied cranberry sauce
- 1 small garlic clove, minced
- 1 Tbsp. granulated sugar
- 1/4 tsp. salt
- 1 Tbsp. orange juice
Instructions
- Preheat oven to 425°F.
- Using a sharp knife, cut shallow, diagonal slits, no more than ¼-inch deep and ½-inch apart, across the fleshy orange side of the squash. Repeat in the opposite direction to create a diamond pattern. Place squash pieces 3-inches apart on a parchment-lined sheet pan; set aside.
- In a microwave-safe glass container, stir together cranberry sauce, garlic, sugar, salt, and orange juice. Microwave on high, 30 seconds. Remove from microwave; stir until almost smooth (some lumps will remain).
- Brush a thin layer of cranberry glaze over each piece of squash. Divide remaining glaze evenly into the cavity of each piece of squash. Place sheet pan in oven, bake 1 hour.
- Remove pan from oven. Using warm glaze from inside the cavity of the squash, brush glaze over each piece of squash. Let stand 10 minutes.
- Transfer squash to a cutting board. Cut squash into 2- or 3-inch thick slices. Serve warm.
Notes
Still not crazy about cutting butternut? No problem! Purchase pre-cut, fresh butternut in the produce section, toss with glaze, transfer to a baking dish and bake until tender and caramelized on top, about 35 minutes.




Leave a Reply