You probably know that my parents owned and operated restaurants when I was growing up. What you might not know is that they also did a lot of catering. We estimate that they’ve catered over a thousand turkey dinners, with each dinner requiring numerous turkeys. Their dinners have always had rave reviews, and now, I’m explaining to you my mom’s technique for perfect roasted turkey. First we’ll talk about the size of the turkey that you need, then we’ll get into the cooking technique (it involves basting and crisping the skin with butter!) that gets you perfectly cooked, juicy meat – even the breast meat is juicy!
Turkey Size
As a general rule, 1 and 1/2 pounds of bone-in turkey will feed one person and provide leftovers. If you are not a leftover family, 1 pound of bone-in turkey will be your mathematical formula. If you will be having a lot of side dishes, you can go with even less, around 3/4 of a pound. This is especially true if you’ll be having appetizers and munchies set out before dinner, and dessert afterwards.
When it comes to choosing your turkey, The Kitchn has a wonderful resource that addresses budget, fresh vs. frozen, and how to identify the different types of turkeys and how they are raised. I will say though, that my parents were buying turkeys in bulk for dinners and weren’t getting anything fancy. So, if you just go into your grocery store and buy one of the turkeys there, you’ll be just fine. With the method below, nothing fancy is required!
Brine Or No Brine?
We never brined the turkeys when catering. And if you think about it, that makes sense. If you need to keep 10 turkeys submerged in cold water for hours, that’s a lot of cooler space. So, I will say that you absolutely do not have to brine your turkey. And, the recipe below assumes that you did not brine it, although it will work just fine with a brined bird, just omit the salt added before roasting.
If you’re trying to decide whether to brine or not, I have a bit to say. First, you can find out more about what brining is and how it works over here. The basic brining technique has your turkey in a water and salt solution that allows the meat to absorb the liquid, making it juicier and also seasoned throughout.
It can be a bit of a pain to brine a turkey though. Typically, when people explain how to brine a turkey, the biggest concern is keeping the turkey and the solution cold for the whole time, and it can be hours. And since it’s difficult to fit a container big enough to hold a turkey in your fridge, you’ll see people doing things like this using a big cooler and ice.
That’s seriously overkill to me. My preference is to therefore do a dry-brine. For this, you’re mixing salt and other seasonings together and rubbing them directly onto the turkey. That goes into the fridge for a day or two. The salt extracts the juices from the turkey, which then get reabsorbed but with the flavor of the salt and seasoning added. So the flavors and the tenderizing properties of the salt get right into the meat. The salted turkey in the cool fridge also leads to a dry exterior which gives you extra crispy skin once the turkey is roasted. You can learn more about how to dry-brine a turkey over here.
If you really want to do a wet brine, I suggest one with a very high concentration of flavor, and with a higher concentration of salt. This allows you to cut the brining time down by quite a bit, making it more convenient. This is the best turkey brine recipe I know of.
It uses a unique technique of making a flavor slurry in a blender or food processor that really extracts the flavors out of the ingredients (onion, garlic, and herbs) making it easier for the turkey to absorb them more quickly. It also has that high concentration of salt that I was talking about.
A final thing about brining. If you really want to wet brine but don’t have the space, you can consider brining and then roasting turkey parts instead of a whole turkey. You can even just roast boneless turkey breasts if that’s what works best for your family.
There are many pros to doing turkey parts (less time to thaw, less time to brine, less space in fridge, less space in oven, more exposed and thus more crispy skin, and you can buy the parts you want more of and skip those you don’t want – no fighting over the drumsticks!). The only major con is that you don’t have a turkey to carve at the table. But if you don’t already carve at the table, that won’t matter. If you’re interested in trying this out, here is how to roast turkey parts and here’s how to brine them.
Okay, now that we’re done talking about whether or not to brine a turkey, and how to do it, let’s dive into roasting the turkey. This technique is really unique and involves topping the turkey with some aluminum foil spread with butter. That buttered foil keeps the breast meat moist while basting the turkey as it cooks. You remove the foil at the end and then that exposed buttery skin crisps up to perfection. Let’s learn how to do it!
Instructions For Roasting Turkey
STEP #1 – Take It Out Of The Fridge
Take your turkey out of the fridge 30 minutes before cooking it so that it isn’t as cold and will cook more evenly. If you have not brined your turkey at all, simply remove all the packaging and pat it dry with paper towels. Don’t rinse it off since that only sprays potential bacteria around your kitchen. If you wet-brined your turkey, also just pat it dry, no need to rinse it. If you dry-brined your turkey, don’t do anything. I know the picture above looks like there’s lots of seasoning about to fall off, but that was the beginning of the process. By then end, it’s the finest of layers and you want to leave it on there.
If your turkey has giblets inside, you can do one of three things:
1) You can discard them;
2) You can use them to make a turkey broth that you use to supplement your drippings when making gravy. This is a great idea if you’re brining the turkey since your drippings might end up too salty, and then you’ll have this broth to use instead. To do this, put the giblets (removed from any packaging) into a medium saucepan. You can also trim away any excess fat or skin from the turkey and add that, and even include the wing tips since they often get too dark from roasting and don’t have much meat on them anyhow. Add enough water to the sauce pan to only just cover the meat you have in there, less is more in this case, since less water means the flavor will be less diluted. You can add all or any of some fresh herbs (like sage, thyme, rosemary), dried herbs or poultry seasoning, raw onion, garlic cloves, carrots, and celery. For the onion, garlic, you can leave the peels on, and there not need to peel the carrots or trim the celery. Just give everything a good rinse. Don’t add salt because that will make it harder to get your gravy seasoning right later. Give it all a stir, some items might be sticking out and that’s actually ideal. Bring the pot to a boil over high heat, stirring occasionally, and then reduce it to a simmer. Let it sit there simmering for 30 minutes to an hour, stirring every now and then. Remove from the heat and strain away the aromatic pieces. Those can be discarded so that all is left is the broth.
3) Add them to the roasting pan, putting them around the turkey as it roasts. This will add extra flavor to your gravy. Mush them up a bit right before making the gravy, and then they’ll get strained away and discarded before you serve the gravy.
STEP #2 – Stuff The Cavity With Aromatics
Don’t stuff the turkey with stuffing or dressing. I know that to some people this may seem sacrilegious. I understand. But really, don’t stuff the turkey. That makes it take longer to cook, which means drier turkey, and it’s been found to lead to more issues with bacteria too. Instead, you’ve got to try my mom’s stuffing recipe. She bakes it in muffin tins and the portions look adorable, and the recipe is classic and delicious, soft inside with a bit of crispness on top.
Instead of filling the turkey with stuffing or dressing, you can put some aromatics in there. I honestly don’t think it’s necessary, especially if you’ve used that ultra-flavorful wet brine or the dry brine I told you about above. But if you really want to, you can. Fresh herbs, carrots, onion, celery, orange wedges, lemon wedges, and garlic cloves all work well. You don’t need very much though. It should be really loosely tucked into there. I think for this picture, I had too much. You also don’t really want it sticking out like that. I did that to make the picture look pretty, I think. But, it’s better to have it all tucked in.
Step #3: Season And Butter The Turkey
Next you’ll be seasoning liberally with salt and pepper, all over. But, there’s no seasoning in the below picture because this turkey was brined. If you have brined your turkey, don’t add anything to it here.
Brined or not, what you’re going to do is to take a big piece of aluminum foil. You’ll want a piece bigger than in the below picture. Let me explain. When I was taking these pictures, I misremembered how my mom did it and thought she only covered the breast meat with foil. She has since told me that I was wrong. So, get a piece of foil big enough to cover the entire bird, two overlapping pieces is fine if needed. Then smear one side of the foil with a lot of softened butter or margarine. You want a good cup (that’s two sticks) of butter spread on there.
Note, I think it’s best to use unsalted butter, especially if you’ve brined the turkey. Or just keep in mind that there’s salt in your butter when you’re seasoning the turkey. If you want to take this whole butter thing to another level, you can add flavors to the butter before putting it onto the foil. This is my recipe for Compound Butter for Turkey. It can be used on the foil before roasting, or you can dot fully-cooked sliced turkey with little bits of it to add buttery flavor at the end.
Then, take that foil and put it butter side down onto the turkey. Press the foil against the turkey skin so that it’s making contact all over. This foil is going to protect the breast meat from drying out, and is also going to keep delicious butter against the turkey for a lot of the cooking process. It’s also going to drip down into the roasting pan giving you delicious basting juices, and delicious drippings for your gravy.
STEP #4: Roast The Turkey
Preheat the oven to 350F. Once it’s ready, put the turkey into a roasting pan and then into the oven. If you have an oven-safe rack that fits into your roasting pan, it’s a good idea to use that since the heat will then circulate more evenly. If you don’t have one, you can use a few uncooked full-sized carrots or celery ribs under the turkey. You won’t be eating them, they’ll just be there to prop the bird up a bit. They will add extra flavor to your gravy though!
If you have an oven-safe probe thermometer, you can use that. Insert it into the breast or the thickest part of the thigh, not touching bone. I don’t use one of these so I’m not really an expert on it. I just use an instant-read thermometer that I poke around with when I think the turkey is nearly ready.
STEP #5: Temperature and Basting
The turkey is going to take between 11-15 minutes per pound. Smaller turkeys often require a little bit more time, and larger turkeys often require a little bit less. Here’s a chart showing the likely roasting times:
Chart: Turkey Roasting Times For Different Sizes
| Turkey Size | Roasting Time at 350F |
| 8 to 12 pounds | 2 to 3¼ hours |
| 12 to 14 pounds | 3 to 3¾ hours |
| 14 to 18 pounds | 3 to 4½ hours |
| 18 to 20 pounds | 3½ to 4¾ hours |
| 20 to 24 pounds | 3¾ to 5½ hours |
If the turkey is under 14 pounds, you will baste it once time. Do the basting when you think the turkey is about halfway done. If the turkey is over 14 pounds, you will baste it twice. Do it at about one-third and two-thirds done.
How to Baste the Turkey: Take it out of the oven, remove the foil but don’t throw it out since it’s going back on. Use a large spoon or a turkey baster to scoop up liquid form the bottom of the pan (you might have to tilt the pan to get at it) and then pour it over the turkey all over. You can scoop several times. Put the foil back onto the turkey, buttered side down, pressing it into place again.
You’ll start testing the turkey to see if it’s done about 30 minutes before the lower range in the chart above. Use an instant-read thermometer inserted into the middle of the breast and also into the thigh, being sure not to touch bone. The turkey is done when the thermometer reaches 155F. However, there are two really important things you have to do so keep reading.
First, when the turkey reaches 145F, remove the foil form the turkey completely then put the turkey back into the oven. This will allow the skin to crisp up during that last bit of cooking.
Second, once the turkey is nice and crisp and has reached 155F in both the breast and the thigh, take it out of the oven. Do not cover it with anything since that will steam it and lose your crispy skin. But, you do need to let it rest. The temperature in the turkey will continue to rise as it rests. You need it to get up to 165F to be safe. Let an 8-14 pound turkey rest for at least 25 minutes, but it can rest for as long as 45 minutes and still be warm. Let a 14-24 pound turkey rest for 40 minutes or for as long as 50 minutes.
Benefits of Resting the Turkey
Resting the turkey is really essential since it stops all the juices from bubbling in the meat. They settle back into the meat and make it juicier, and make it less likely for the juices to all pour out when you cut into it. You want as much of the juices in there as possible. So don’t skip and don’t skimp on the resting time. In fact, the resting time is a cook’s best friend.
You see, people have often complained to me that the large possible range of cooking times for a turkey make it hard to know when to serve the meal. I understand that. However, I think you need to look at it in a different way. Instead, don’t worry about the amount of time the turkey takes to cook, instead focus on the resting time. If you know that once you take the turkey out of the oven, you have exactly 45 minutes before you’re going to be carving it, you can plan your side dishes with that in mind.
Sides that take 45 minutes or less to reheat can be pre-made and then reheated in that resting time. Things that need to be made last-minute, like gravy, get made in that resting time. See what I mean? Don’t worry about how long the turkey takes to cook. Instead, just plan to be wrapping everything up during the resting time, and then your timing will be perfect. If people are asking when dinner will be ready, you can give them a range, “We’ll be eating between 4:00-5:30.” If there are little snacks and drinks out, nobody’s going to mind! Okay, let’s talk a little bit about making gravy now.
STEP #5: Make Gravy
You’re going to want to transfer the turkey out of the pan and to another container so that you can access the drippings that are in the roasting pan. These are liquid gold when it comes to making gravy. I’m not going to get into all the how-to’s of making gravy here, but just a few things.
First, no matter what, you need to separate the fat off of the drippings. I like to use a gravy separator for that. Or you can just let them rise to the top and then spoon them off.
Next, if you brined your turkey (wet or dry) your drippings might be salty. When I brine poultry, I typically do this technique of making gravy without drippings (which can actually be done ahead of time!), but I don’t add any salt. Then, once my turkey is done, I taste the drippings and use their saltiness as seasoning.
If you haven’t done the make-ahead gravy without drippings though, don’t worry. This gravy tutorial really explains how to test your drippings and how to make use of them even if they’re too salty, so you can do that instead.
I’m also going to link to my cornstarch gravy here for you. If you have any people coming to your dinner who eat gluten-free, make this for everyone (but use your de-fatted turkey drippings in place of the broth). Another interesting thing to do is to make vegan gravy. If you have any vegetarians coming who are planning to make a meal out of sides, you can offer them this to put on their potatoes and stuffing. You can even make up the vegan gravy, divide it in half, and then add your turkey drippings to only one half of it.
STEP #6: Carve The Turkey
Once the turkey has rested, and the table is set, and your side dishes are all heated up, and your gravy is ready, it’s time to carve the turkey. I don’t love doing this at the table since it’s a lot of pressure. I do it in the kitchen. Wherever you’ll be doing it, here’s my guide for how to carve a turkey. If it’s well-rested and you have a sharp knife and a cutting board with some grooves in it to catch any drippings that escape, you’ll be good to go!
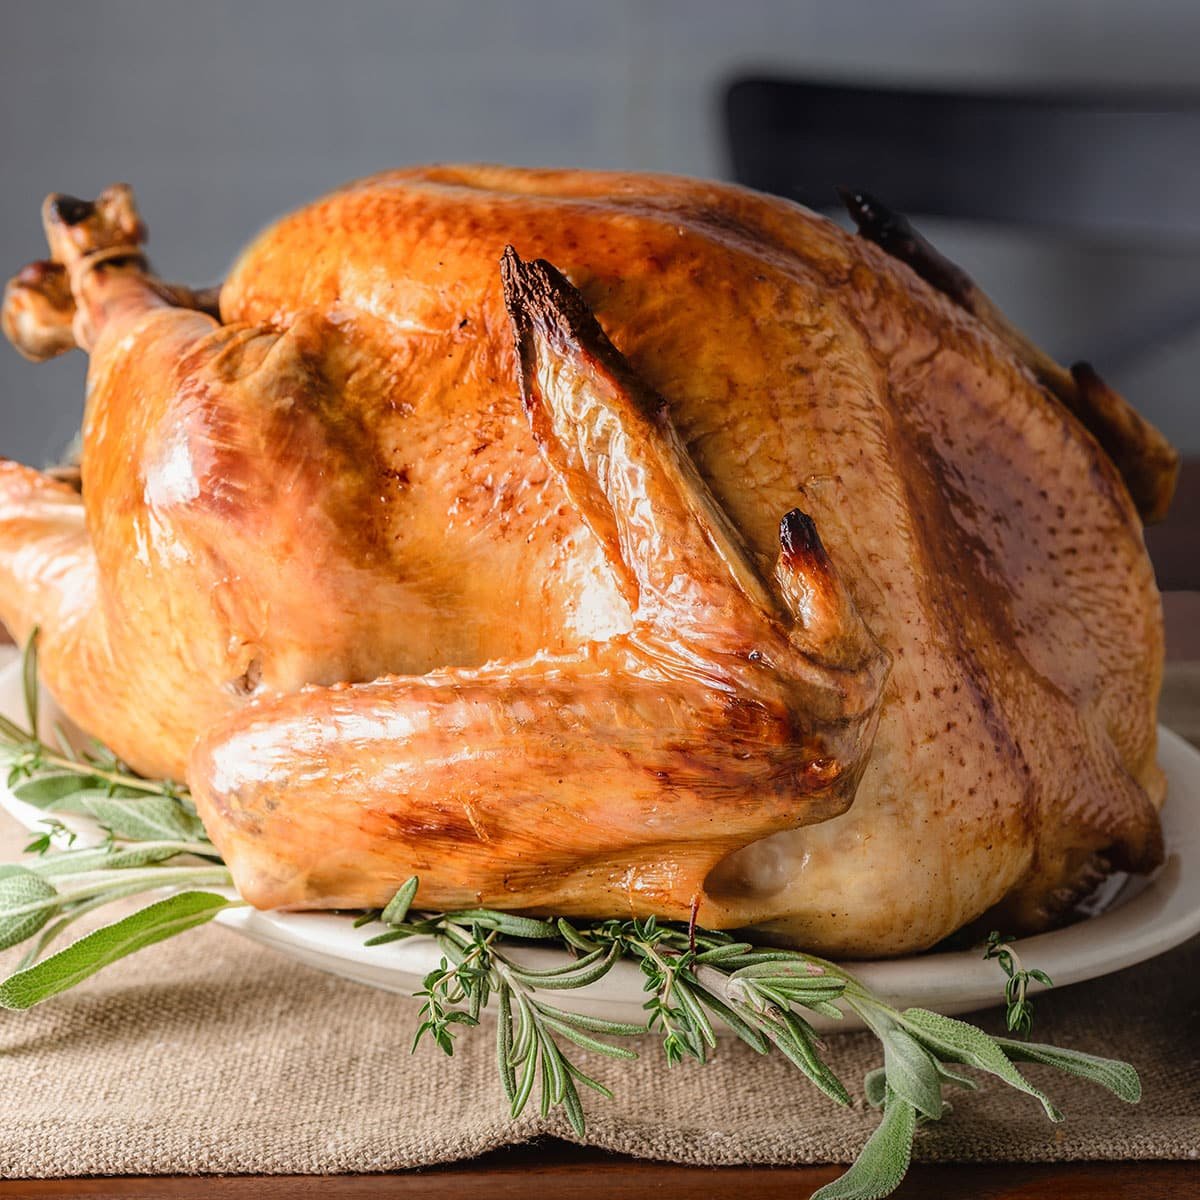
Congratulations! You did it. You have a perfectly roasted turkey to gobble up. lol. I hope you have a truly wonderful meal.
More Turkey Recipes
You can browse my collection of Thanksgiving recipes or check out some of the following options if you’re not up to roasting a whole turkey.
Podcast Episode: Roasting Whole Turkey
Listen to learn how to make this recipe, along with some great tips from me along the way.
Listen to more Recipe of the Day episodes here.
PrintHow to Roast Turkey Perfectly (Recipe)
- Prep Time: 1 hour
- Cook Time: 3 hours
- Total Time: 4 hours
- Yield: 10 servings 1x
- Category: Entrée
- Method: Baked
- Cuisine: American
DESCRIPTION
A miraculous technique for roasting turkey using aluminum foil smeared with butter to protect the breast from intense heat, while basting it. The recipe below assumes that you have not brined the turkey. If you are brining it, see the info above for more details on what to change here. The cooking times and nutritional values given are for a 10 pound turkey feeding 10 people.
Ingredients
- 1 thawed turkey, 8-24 pounds
- 1 onion, roughly chopped
- 2 stalks celery, roughly chopped
- 2 carrots, roughly chopped
- Several sprigs of fresh herbs such as parsley, sage, rosemary and thyme, tied in a bundle with kitchen twine
- 2 tsp. salt
- 1 tsp. black pepper
- Aluminum foil
- 1/2 cup butter, softened
Instructions
- Take turkey out of the refrigerator. Remove packaging, and remove giblets.*
- Pat dry with paper towel. Let rest at room temperature for 30 minutes.
- Preheat oven to 350°F.
- Loosely fill the cavity of the turkey with onion, celery, carrot and the herb bundle.
- Combine the salt and pepper in a small bowl, then sprinkle it all over the outside of the turkey. Depending on the size of the turkey, you may not need all of it.
- Get out a piece of aluminum foil that is larger than the top surface of your turkey. Smear the butter all over one side of it. Press the buttered side of the foil all over the the top surface of the turkey so that it has good contact all over.
- Arrange an oven-safe rack in a roasting pan large enough to hold your turkey. Put the turkey with the buttered foil on the rack.**
- Place the turkey into the oven and cook for 11-15 minutes per pound (see roasting times chart above). Once or twice during the roasting time, remove the turkey from the oven, remove the foil, use a spoon to baste juices from the pan all over the turkey, then put the foil back in place and return the turkey to the oven.
- Begin testing the internal temperature of the middle of the breast and middle of the thigh, being sure to not touch bone, using an instant-read thermometer, about 30 minutes before the lower range of the times given. When the turkey is at 145°F, remove the foil so that the skin can brown and crisp during the last bit of cooking.
- Continue to cook the turkey until the internal temperature is 155°F.
- Remove the turkey from the oven and allow it to rest for 30 – 45 minutes. While it rests, use the drippings to make gravy.
- After it has rested and the internal temperature has raised to at least 165°F, carve the turkey and serve it immediately.
Love this recipe? I’d appreciate it if you could scroll down and add a *5 star rating* to help others know they’ll love it as well!
Notes
*See above under Step#1: Take It Out Of The Fridge what you can do with the giblets.
**If you don’t have an oven-safe rack, you can put a few whole uncooked carrots or ribs of celery under the turkey to allow the hot air to circulate. You won’t be eating these but they will actually add some flavor to your gravy. A halved onion can go under there too!